ECM SOFTWARE SYSTEM


If you want to be refreshed, visit Crater Lake in Oregon. If you want to help educate your children go with IETCOM.
COPYRIGHT ECM 1987 2006
Individualized Educational Training System
IETCOM SOFTWARE

![]()
FEATURES OF THE IET SYSTEM
The IET system consists of two categories:
While the management system is simply called IET, the software system acronym is IETCOM. This document is a description of the IETCOM procedures. You can also access the conceptual ideas of the management system by the selection above.You may find this difficult to follow online. The description of this system when loaded has a vast number of displays showing a step by step process. The web format is simply provided to show the vast capability of this system. First of all it is advisable to try the system so as to understand all the elements. This is the reason why this system is built in part. The system is intended to be dynamic and under the control of the teacher or tutor. Mostly all elements are replaceable with your own educational perspective except for some special leaning functions. This is a management tool which will expand greatly when accepted.
In short the combined management and software system are intended to produce an environment of an improved learning environment, improved teaching tools, and a reduced workload for teachers.
IETCOM SOFTWARE SUPPORT SYSTEM
The IETCOM primary menu has these four categories:SYSTEM CONTROL FACILITY
The IETCOM system control facility manages the operation of the various options that are provided in the system. First of all there is a key component that is automatically controlled and that does not require any interface. The system is designed to support different individuals that may be using the system on the same commuter.The IETCOM system is designed to support nultiple user needs. This is not a generalized system that supports all possible combinations making it a difficult process to utilize. The first menu in the student learning facility is the only menu that is static, the others are dynamic. In other words you will have the ability as a teacher to set them up as you need. Or for that matter, the student can set them up to support his or her needs.
When a student signs in to the student learnit system, the menu's and data can be dynamically changed as will be discussed later. What the system does is when you exit it will save those changes to a sub directory so that when that student accessed the learnit system, he or she will have the customized system that was prepared earlier. This implies that a specific computer is utilized by more than one person.
The system control facility will provide the ability to propagate this profile to other students who are in the same range of the IET achievement spectrum. In other words, a teacher will first build an educational profile for one student and propagate it to all the other students who will be using this system otherwise the tutor or teacher would have to repeat the process for each student.
The System Control Facility has the following categories:
- IET CONTROL PROCEDURE
- DISPLAY/UPDATE IET USER LIST
- DISPLAY/UPDATE IET SUBJECT
- RUN STATISTICAL REPORT FOR STUDENT
- DISPLAY/UPDATE IET CONTROLS
- PERSONALIZED AUDIO RESPONSE
- PROPAGATE/DELETE STUDENT PROFILE
IET CONTROL PROCEDURE
First of all, you can get to the IETCOM documentation facility at any IET menu by pressing the right button on the mouse.
Note that there will be an entry in the list. You can leave them or replace them.
Be sure to start each entry with an (*) or (#) otherwise the system will not recognize
them. Before you ever delete an entry in this list which was active be sure to
delete the profile entry first.
When a teacher makes an entry, the initials must match those used in the C~GATES
system user entry. If a teacher decides to split up a class into multiple groups,
she or he has to set up multiple entries in the user list, one for each group.
If in a home schooling environment, tutoring students at different age levels
and subjects, each student must have a specific grade code as part of the user list.
Remember the teacher does not enter a telephone number. Their entry would be
GRPA GRPB GRPX ETC. The reason for this is that the profile may be different
for each group thus the propagation process requires this method. In other words
you will load your profile for a grade group of students,
make changes at a later date for a grade group and then propogate the changes
to all students in the group. This process will be discussed later.
The IET subjects list is pre developed although it can be changed. Each
area of study must have a 10,20,30, etc associated with it. Each of the
subjects within that area of study must start with the same 1st digit and
then be incremented. Example:
The significance of this list will be described later but you must have
an entry here to obtain statistics in any subject area. You will also be
required to enter the subject code in the development process.
This part of the system is not for testing the individual per say but rather a method
of learning. It is important not to place the final grade on this statistical result
alone. There is a testing method that will be described in the TEACHER SUPPORT FACILITY.
When you enter this function, the program will ask you if you want to delete or print
a statistical report. If you choose to Delete then it will ask you if this is a
total or partial deletion. If you select total all the statistics for a given
household as established by the telephone number will be deleted. If you select
partial then only a given year of statistics will be deleted. Note that the
statistics do not take up much space so it is not highly important to delete
anything.
If you had selected to print a statistical report then the program will ask you to
enter the following:
It will then ask you if you want to select a range within a given year or print a
total report for that student of all the work that he or she has done on the IET
system.
It is important to note that the C~GATES system controls the printer port that will
be used by the IET system. The IET system will always use the printer port 1. If the printer that you are using is a parallel printer port you will have established that
by entry of a (1) in the printer port selection option. If you have two parallel
printer ports and wish to use the second printer then you would enter (2) in the printer port selection. In most cases you will not even know what a parallel printer port is since you will be using an USB printer port. If this is the case then you would
enter an (X) in the printer port selection.
To find out how to do this return to a C~GATES menu, press the right button on your
mouse and look for PRINTER PORT SELECTION.
Because of the nature of the IET system, the IET controls were set up in such a way
that it would be easy to expand them without any major programming changes. We expect
the system to grow in capability as the years go by. This is a dynamic area of
thought so it was necessary to set up a dynamic control facility. This should explain
why we set up the controls the way we did.
The following list is the current set of controls and informative files that are
currently supporting the system:
Each language must have a subject code that corresponds to the numeric
subject codes in the system list of areas of study and subjects described
previously. In addition to this code it is suggested that you use the first
two letters of a language for the language reference code. This is easy to
remember and the student will be asked to enter it if he or she wants to
switch from one language to another when she is finished studying a word
set. This provides the interface for that facility to work.
When done press ESC and the changes will be applied
The initial password for the SYSTEM CONTROL FACILITY is 1111. If you select
the code PASS you will access the password control module. In it you will see
The initial controls for both imagery and video is two fold:
First of all to access these controls enter CTRL as the control code. Now when you
installed the system you were asked where to install that portion of the system that
has the AUDIO, IMAGERY, AND VIDEO FILES. Note that this portion of the system will
grow well over 1 gig of space. If you have the space on C drive select C drive. If
you have another hard drive with more disk space available select that one. It is
usually the D drive. If you don't have enough space for this portion of the IET system
then leave the system INACTIVE. On the other hand specify the drive that you used in
the first line and then change NON ACTIVE to ACTIVE. Press the ESC key to save controls.
If you did load the video, audio, and images on the D drive then you would change
the controls to the following:
Note that even if the setting is NON ACTIVE there will be audio response to exceptional
achievement in any learning effort. What you will not get is the AUDIO for each of the
languages. If the system is active you not only can see the word set for a given group
but also hear it in that language.
Select E) DISPLAY/UPDATE IET CONTROLS. The program will display a list of entries.
The one that you will select is LANG. Press ESC and then enter LANG when asked
and a short description (ie. LANGUAGE SUPPORT).
Each time you press ENTER the arrow will move down to the next line and finally to the next page. Lets say you decided to add Italian language and you used the propagation
facility to do so. When a blank like appears you would enter IT - 18 ITALIAN.
You have up to 8 function keys to use in support of language support documentation.
While the first seven have been pre-developed you still can change them or add
documentation for a new language. To make changes to the support documentation as
provided when you press the function key in the LEARNIT SYSTEM, fist of all you must
be authorized to do so. That is your signon in the system user list is marked as
an administrator. # other than * at the start of your entry in the list!
From the primary menu select STUDENT LEARNIT SYSTEM
Enter your initials and telephone number.
Select Foreign Languages
Select Study Languages
Select New Language in this case ITALIAN. Now this required a menu update which
is described in another section and will not be detailed here. The building of
support documentation relative to a new language will also be discussed later.
For this feature you will need a microphone on your computer since you will be the
one creating the messages that your students will receive any time they get 100% on
any effort. Furthermore you can also add a special encouraging message for a student when he or she first starts the learnit drill. Keep this one short! When recording be sure not to
delay after you press record else you will get static in the message. Furthermore once
the message is complete press the stop button immediately for the same reason. Here are some
examples of a proper message:
It is very important to personalize the system for an individual. This is the key
to the success of the methodology and software support system. Be sure to use the
individuals name when recording the message. The message will only play for the
individuals that accessed the system. This is achieved by the fact that the
student must enter his or her initials and last four positions of the telephone number.
To record a message select PERSONALIZED AUDIO RESPONSE ENTRY. A message will appear first.
Then an audio recording facility will be displayed. Press the RED button and record
message. When done press the stop button. You can play the message. If you are not
satisfied press the RESET button and record again. When done press the EXIT button.
Now you will be asked if this message is for a 100% performance or Intro into the
system. Select either one and press ENTER. The message has been saved and a audio
response will occur when the student that you prepared it for utilizes the system.
The profile facility provides for support of multiple users of the system on the same computer. Now the IET system is dynamic and is totally controlled by the tutor or
teacher or professor or parent. Menu's are dynamically set up as well as data elements
in support of specific educational requirements based on the levels of achievement.
Once it is developed for one student this format or profile can be propagated to other
students otherwise you would have to set up the same changes for each student. Also at
the end of a school year or when students leave for college you may want to delete
the profile. You can do both with this function.
Once you have developed the profile for one of the students you can propagate it to
all the other students. To do this you first must select the STUDENT LEARNIT SYSTEM
from the menu. This will load the profile once you have entered the initials and
telephone number for that student. Then exit out of the learnit system. Now select
SYSTEM CONTROL FACILITY and then PROPAGATE/DELETE STUDENT PROFILE.
The system will first ask you if you wish to delete or propagate a profile.
If you wish to delete a profile it will ask you to provide the students initials
and the last four positions of his or her telephone number. Once entered it will
ask if everything is correct and then proceed to delete the entry from the profile
directory.
If you wish to propagate a profile that you developed for one student, it will first
ask you for the students initials and last four positions of the telephone number.
It will then ask you to enter the initials and last four positions of the telephone
number for each student that you wish this IET profile to be propagated to.
If you decide to make some changes to the profile for the primary student then you
will have to repeat this procedure.
You might at first think this is to simple to be beneficial. Well consider this.
when studying any subject in an area of study you learn new things. Each thing
has a name. If you first organize these things in a well structured and grouped
manner, then the mind can retain them more easily. Once you know all the new
elements you can proceed to understand them.
In support of understanding there will be videos and imagery that could be
played over and over again. If there is still some misunderstanding then the
teacher or tutor can help. But first you need to establish a basis of understanding
which is a knowledge of the elements for a given subject. Furthermore, this system
sets restraints so that the number of elements for a given category can not
exceed 16. If it does then the developer must figure out how to logically create
new categories. Each level of study can expand the understanding and knowledge base.
Example: In chemistry you don't say to a student lets learn the 100 plus atoms that
exist in nature. Rather you say lets study the most prevalent 7 atoms in our
environment. That is all you have to learn and understand for level 1. If you want
to learn more proceed to level 2, etc. Why did you limit to 7. Because the IET menu
max is 7. But what happens hear! but what if we limit our chemical reactions to 4
and study all the states of matter in level 1. Maybe we can start studying chemistry
as early as grade 2.
An then the scenario continues. Can we break down physics, engineering, computing the
same way? Now kids will say by grade 2 that the want to be astronaut or and engineer,
or a physicist because of the excitement of learning. Kids will get hooked on
education provided they realize that they are really learning something new and they
have mastered the select group. With a little challenge from the teachers, the gap
between American students and others
from various countries will be reduced.
One other thing. When the HIERARCHICAL structure, essential elements, and achievement
steps lets say for chemistry are designed. The word chemistry at LEVEL 1 means
something highly different than chemistry LEVEL 7. In this way you limit the
infinite. When you limit the infinite and organize it to a manageable level for an
age group, you breed an environment for success.
A student can say after looking as the profile of chemistry level 1. Wow I think
I can master that! Furthermore, if level 1 chemistry is started in grade 3 of
elementary, a high school student starting chemistry must start at that level as
well. Now it might take about 2 weeks to get through it while a 3rd grader will
require a whole year.
One more item. If a student completes a level of study in a subject that is deemed
College level, he or she should get college credit for it. Of course this idea is
already being used.
Now the only person that can utilize this facility is the administrator of the
system. The administrator is any person on the user list for the system that
has the proper code. Please refer to the IET user list and it will tell you
how to do this. This information is under password protection. You need to look at the list
and make the appropriate changes. Remember that to get to this list requires
the C~Gates password or system administrator password.
So if you are planning to making changes to the system you will need to sign
on as the administrator with the proper initials. Remember to propagate the changes
when applied to menus. First to yourself and then to anybody else that these changes apply to.
We envision that an IET data base can become a depository of creative
presentations that could be analyzed on the internet and down loaded to
your computer for your inclusion into your system. We would provide that
database on our server for all users. A small fee would be charged for a
download and a small fee would be routed to the individual or business
that provided that element. Payment would be through PAYPAL.
The system when installed has samples of menu's, data lists, data definitions,
educational drills, audio response, graphic support, video presentations.
It was not the intent of ECM to develop a total educational package for
grade school, high school, and college. That would be a massive undertaking.
This is basically a management system consistent with the primary objectives
of the corporation and its directive to develop computing, energy, and
management systems.
We believe that it is better to start the process, develop the management
philosophy for the educational process and then create a computing
environment friendly to accommodate it.
While the learnit system is not fully developed as to content, the management
process of utilizing it and developing it has been fully completed. The other three features of the IET system have been also completed. They are:
The development process will be broken down to the following categories:
This system could position the United States well in the competitive business and
scientific world. I predict that cost of college education will go down just like
the interest. Why? Well as you learn this system you will understand why.
I apologize for digressing but justification of the utilization of this system is
simply part of the process.
Returning back to the log. A log must first be developed for each area of study.
Each area of study can have up to 15 subjects. Because of the 15 number, we will
use base 16. This is the numbers are 1,2,3,4,5,6,7,8,9,A,B,C,D,E,F. With zero that
makes 16 numbers. The reason for this will become apparent. At the top of the
log after a short description, you will see a list of subjects currently developed
that you may utilize. As subjects are developed or in the process of being developed
they need to be added to this list.
Below is an example for foreign languages:
We have arbitrarily selected foreign languages as area of study 1. Note that
English or your primary language will not be in this list. English as your main
language has not been developed as of yet. It would be more extensive than a
foreign language.
The first letter after the first number is (A) which represent a level in
the HIERARCHICAL structure of the area of study. Since this is the top level
this letter will always be an (A) in this list. The next number is the subject
code or actually the last number of the subject code since the first number of
the subject code is the area of study number. This becomes the name of the
primary control file for a given area of study.
In addition to the code, the subject must be listed followed by the actual
subject code and the data file pattern that will be used. Note that in both
the menu control file and the data file there is a secondary name but you are
never asked for it and the system will take care of that item.
Each data file can have a supportive AUDIO, IMAGERY, OR VIDEO FILE. In languages
it is a combination of AUDIO and VIDEO and in all the rest it can be IMAGERY
OR VIDEO.
For this reason the first entry in Humanities must be English. Now this does
not limit that system to English speaking countries although if this system was
used by a lets say Spanish speaking country, it could be modified to support it.
In that case all the menu's and data files would have to be converted to that
language. But it could be done. Furthermore Humanities must retain the 5th
position and defined as IET5A with English as IET5A1.
It is important only to list files here for subjects that have been or in the
process of being developed.
After the short description you need to establish your HIERARCHICAL structure
for the area of study. Of course this may already have been developed. Furthermore
as time proceeds, you will be able to download HIERARCHICAL structures for areas
of study which have all the support files already developed. Of course you can
develop them yourself.
This process should be handled primarily by the curriculum department. Of course
if you are home schooling, then you may want to do this task yourself. If you
did what you consider a great job, we may want to purchase it from you.
The HIERARCHICAL structure needs to be set up for each subject. Thus the code
used above will be the first code used in your structure. If the code starts
with an IET that means it is a menu and the menu has to be developed. If the code
starts with a file name such as RU01 then that data file needs to be developed.
Here is an example from the foreign language HIERARCHICAL structure for Spanish would
start with the following menus.
The data file name must start with the selected 1st and 2nd letter of the subject. Examples are:
When you decide to build a menu with either text or other menu line items you will
first take a look at the log file for that area of study. As you will find the process
is easy to develop menu's and then data files. Developing effective audio, video, and
imagery in support of a category takes creativity and a lot of time.
When you select a specific area of study you are provided with a mini menu.
You have the choice of and lets say you choose the Foreign Language area of
study
When you select option A you will get the following menu:
The procedure is the same for building either a 4 or 7 option menu.
So let us discuss the procedure as if it was for a 7 option menu.
From the screen above you would select option C. The following menu
would be displayed:
Looking at the log file you see that IET4A4 has been assigned to Astronomy and you know
it has been built but IET4B4 (SOLAR SYSTEM CATEGORY ) has not. So the first thing
you will do is select A) BUILD NEW 7 OPTION COMMAND FILE since the log file
shows 7 items for that command file. The program will ask you to enter the command file
name which must start with IET. So you enter IET4B4 and the control module is built.
The program will ask you IS THERE ANYTHING ELSE TO DO and your response would be (y)es.
Now you will select option B) UPDATE MENU OF COMMAND FILE. Now the program will ask you
to enter the name of the command file again. Since you already entered it simply press
ENTER and it will use the previous name.
The program will display a generalized menu and position to the first entry.
You will need to replace the total line entry with your selection. Since we
are doing Astronomy and the category of solar system, the first entry should
refer to the Sun so you would enter the following:
The next item is to update the command line for each of the menu line items. For this
you will select option D) UPDATE COMMAND LINE. The program will again ask you for the
control file name. Since you have already entered it simply press ENTER. Note that if
you exit to the previous control module you will have to reenter the control module name.
After displaying the menu line items it will ask you to enter the letter code for
the menu line item that you wish to set up a command line. A command line is a
command to the computer to do something. In this case it is to access a data file
or access another menu. So once you enter the respective line item letter, it will
ask you if this is another menu. If so then it will ask you for the name of the
next menu. The name of the menu will always start with IET. If it is not a menu then
it is a WORD SET ENTRY. So enter (y)es when asked if it is a WORD SET ENTRY. Then
it will ask you to enter the name of the word set file. In the case of Astronomy
the file name will start with ASTRxx where xx is the sequence number. When complete
it will ask you if you wish to make another entry.
The next item that you would want to deal with is the menu header. You can change this
by selecting option E) UPDATE MENU HEADER.
Finally you need to tell your new control module where to go if you press the ESC key
or press the left button of the mouse when the pointer is close to the menu header.
For this you will have to look at the control file log and determine which module
should be return to. Once you have done so simply select option D) UPDATE EXIT OF
COMMAND FILE. It will ask you for the name of the control file. Again the name
will start with IETxxxx.
Once you have done these entries you are ready to use the menu. This process is
easier than the C~GATES menu's because of the fact that there are only two options
for the command line being:
The word set and the definitions must be originally installed into the system or built by you.
You can also change the word set or the definitions if you feel that it is appropriate due to
an incite into the subject. This section will explain the process.
First of all the administrator of the system is the only person that can change the system.
The administrator could very well be the student if approval is given. Approval is simply
making a simple change to the USER MASTER LIST. Each entry in the list starts with an (*).
Simply replace the * with a # and that person becomes an administrator for the system.
In the user master list, you will be advised of this option.
The student may want to use the system to develop an area of study in support of learning
word sets the same way as you would with the help cards technique. Since each person could
change menu's and utilize his own set of data files is the reason why we save and restore
individual files.
The only restriction is in the naming of the files. First of all you will still have to log
your entries for a given category of a subject in an area of study. If this information
is specifically for an individual be sure to allocate a set of sequence numbers in the
area of study log. The system will store it in the appropriate directory based on
the area of study selected. The reason for this is that the data files are not profiled per student. On the other hand the menus are propagated and it is there that you specify what
files to use.
Furthermore, if what you developed was interesting to another student and since you have
the administrative authority you could propagate your system to another student by using
the SYSTEM SUPPORT FACILITY and select option (G) for propagation to another individual
that utilizes the same computer.
Now lets get back to the process of building the category data. From the primary menu
you would select STUDENT LEARNIT SYSTEM. When the areas of study menu appears you will select
the area of study that you will be working in. Lets say it was science. When you click on
that line item you will see the following mini menu:
First you would select LOG OF DATA AND COMMAND FILES and print the file. This will give you
the information you will need as to the name of the file when asked. Of course this is not
necessary since this information is only a keystroke away. That is you could first access
the log file and then build the question and answer data file.
Now if you have used the EASYCOM word processing facility and have selected the paragraphic
mode of entry, you will only need to skim through this part of the description. The
Learnit system utilizes the paragraphic mode of entry to support all data files in the
system that are used in the student Learnit system.
The first thing the program will ask is for the name of the file. Lets say you were
rewriting the 5th files in support of Astronomy and specifically the category of
the planet Jupiter then you would enter . The AS is the acronym for Astronomy
and 05 is the sequence number for subject of Jupiter as listed in the log file. Now the next thing it will ask for is a heading. You in this case will enter JUPITER or THE PLANET JUPITER.
Now the program will ask you to enter THE WORD/CODE. While you do not have to enter a prefix
code such as A) or B) it is advisable for ease in modification. That is to say, once the entry is made and you wish to modify it, you simple enter the LETTER associated with the word and it
will display the description that you entered. Note that in the Learnit system you will need to answer the question with the letter prefix and not only the letter code. The reason for this is that the learning process benefits from two impulses, that of viewing and that of
typing the word or word group.
Lets say that you want your first entry for Jupiter to be 11.86 earth years. So you would
enter A) 11.86 EARTH YEARS. Once you hit enter, the cursor will position to the top of
the left window and you can enter a description that means the length of year for Jupiter.
It is always a good idea to add some more information that will be absorbed by the student.
When done with the entry press the ESC key and this will save it.
At this point you will be asked "END ACCESS OF CATEGORIES? (Y/N)" If you hit enter which is
always a No, you can proceed to make another entry otherwise it will give you an end of
process mini menu option. The options are:
To update any of the words or phrases that appear on the right side you will select
EDIT PARAGRAPHIC HEADING. it will first verify that you want to do this then it will
ask you to enter the word or phase in error. If you have an alpha code prefix then
simply enter the prefix of the entry in error. When it asks you to replace it then
enter the new word or phrase entry with the alpha code prefix. Then follow instructions.
To delete an entry follow the same procedure as in updating except you need to enter the
word or phrase exactly as it appears for the system to delete it.
You can enter up to 16 entries per category. You must enter at least 8 entries for the
system to be activated.
A video can also be created to support understanding a concept or viewing and
hearing a conversation in a foreign language that uses only the words for a
given category. In this case you will save the video in IETCOM\VIDEOS.
The format is:
Imagery can also be a means of improving an understanding of ideas and categories.
Now we do not feel that a image of its own is good enough for this system. So we
have decided that imagery along with animation, text, and sounds would be more
effective. Thus only imagery programs are supported. Software is available
to create this form of imagery from Alchemy Mind works Inc. These
program must be stored in IETCOM\IMAGERY directory. The format is:
Imagery media support will play before the start of a learnit word set. The student will
be prompted to the fact that an imagery media is available. Once done he or she can proceed
with learning the word set.
For imagery there is also a second option with regard to the primary menu for a given
subject in an area of study. This imagery is restricted to the IET essential elements
that have been determined for that subject. If you have come up with a better set or
one has not been developed yet for a specific subject within an area of study you can
build one and store it in also in the IETCOM\IMAGERY directory. The format is:
In Arithmetic you will not be making any changes since the system is very basic. It supports the
process of:
In typing basics and speed typing, you learn how to use the keyboard. The more accurate
and faster you are in this area will help you in everything you do on the computer. You
can edit all the data files but you should not change the menu. It is the 4th entry in the
area of study called ARTS AND SKILLS. It should remain so!
You may decide that there is more appropriate text that should be provided to your students
then what was originally entered. You can change this as described above. The important
thing here is that you replace what is there and do not add or delete entries. Everything
has already been developed but based on the philosophy of providing the user the ability to
modify almost everything, this is also the case as to the text. The only thing that is very
important is that when you change a paragraph be sure to enter 10 lines of text!
In speed reading it is a little different. There are originally 21 stories already developed.
There are three levels of difficulty. The first level has files RE11 thru RE17. The second
level has RE31 thru RE37 and the third level has RE61 thru RE67. In speed reading you can
select up to 6 stories at a time for each level. The computer will randomly select the
story from one of the six you have entered. This implies that you can add more and more
stories for speed reading. As you do you need to make an entry in your ARTS & SKILLS
log. Therefore in speed reading you will not replace anything but rather add a new
story that is appropriate for a given level.
Each level has a control file:
From the primary menu the student will select STUDENT'S LEARNIT SYSTEM. The student will be
asked to enter his or her initials along with the last
4 positions of their telephone number. This information is verified by the user master list.
If present the student can proceed to utilize the system. If not the student will not be
permitted to use the system since statistics could not be kept for the new student. The
tutor or teacher must first make an entry for that new student.
Once approved the student will be tracked as to his or her activity. Teachers and tutors
can at any time request a printout of the activity report for any student.
When the student is approved he or she will receive a welcoming message and a special
display message especially prepared for him or her. Upon pressing the enter key, the
program will display seven areas of study. Lets say for the sake of discussion, the student
wants to study a foreign language specifically Spanish. He will then select LANGUAGES then
a mini menu will appear and he or she will select STUDY FOREIGN LANGUAGES. Next the seven
language menu will appear and the student will select the subject of SPANISH.
The next screen will be categories of the Spanish language and sub categories. If a
category has sub categories selecting it will display the sub categories otherwise it
will proceed to the LEARNIT process. The learnit process shows from 8 to 16 entries on the
right and will ask a few questions before proceeding with the drill.
If it has a audio file for this category, it will ask the student if he or she wants to
listen to it. If so it will play it otherwise it will ask if the student wants to proceed
with the drill. If (y)es it will ask if the student wants the list of words to remain on
the screen. If so it will leave then otherwise it will remove them. You would not want to
remove entries unless the student was in an advanced study mode.
Now the program will display a description in the left window. The student must decide
which entry on the right matches up with this description. It is then necessary to type
it into the field asking for answer. The entry must be exact as it is displayed otherwise
it will be considered an error. If correct the student will get a positive response. If
not he will be electrocuted and the next student can take his place. Well not really.
Just a negative response. If an incorrect entry is made more that twice, the correct
answer is displayed so that the student can learn from this process rather than get
frustrated.
The selection process is random and the same question could be asked more than one time
in an exercise. Once the process hits 12 times, it stops and provides for a display
on the percentage of correct answers. If the student gets 100% correct, he or she
will receive a positive response which will be directed specifically for that particular
student as set up by the teacher in advance. Such as "Jenny, you did great, congratulations!"
The reason why the entry has to be entered in total is that this helps both in spelling
and the fact that the person sees the answer and also types in the answer. This will help in
the retention of the information.
Now if there is a video associated with a category file and the student achieves 90% or
better in the drill, he or she will be asked if she wishes to review the video. In
language, the video is a conversation which includes the words just mastered.
If there is a graphic display associated with this topic, the student will be advised of such and given the option to display it before proceeding with the drill. All graphic displays will be highly informative and could contain multiple pages of information, displays, and gifs.
In the language section there are audios associated with each topic. When the student selects the topic and if an audio file has been developed for it, it will play. Each word in the group is said first in English and then by an individual expert in the foreign language. After that
the words in the group are said once again in sequence so that the student could repeat and
watch the word set on the right window.
In addition to the method described there are a couple of areas that are unique.
You can look in the log file and find the names of the text files. These files can
be changed to make the information that the student is typing more appropriate. Now
the first three are simply key strokes learning method. You can even changes these
if you prefer a different method that may work better.
In the non speed test (A thru D) you are asked to type a word. If you do it correctly,
you will be credited. If not you will not be able to correct it and you will be
docked. Statistics are kept and the student should be advised to advance himself of herself to the next level until all levels are mastered. Statistics are kept for each student. So the
tutor or teacher can review the progress being made.
In speed typing you are given a paragraph to type. You will type three lines at a time.
At the end of the three lines the program will stop you and give you statistics as to
how fast you are typing. If in the process of typing you make an error it will be posted on the right side. If you exceed 8 errors the program will stop you and tell you to retry
but at a slower pace. The program does not permit you to correct the error. We are trying
to enter the text perfectly.
When you are ready to type you will press the (=) key. The timer will start and you will proceed to enter another three lines. The student is not to press the ENTER key since the program advances to the next line automatically just like the word processing facilities.
The menu for this subject is:
A teacher or tutor could consider this process as if using flip cards in the past where the
word is on one side and the definition is on the other side.
You can set up word sets starting with the file name EN05 and can extend to EN99.
In option A,B,C and D the student will be given a list of words in the right window and a
definition in the left window. He or she then has to decide which of the words is the correct one for the definition. In the line that says "THE ANSWER IS = " the student will enter
the word. Statistics will be kept as to the success of the drill by the student. The
teacher can at any time print these statistics for any student.
Now is speed reading in the English language, you have 3 levels of difficulty. When a
student selects a level, a paragraph line is displayed one at a time. At higher levels
the lines are displayed faster and the subject material is more difficult.
The last sentence is in the form of a question. The student must then decide which word
from the right window which has all the answer words listed is the correct word. Again
statistics will be kept as to the success of the drill by the student.
The readings are randomly selected from the list of six stories for each level that the
teacher presets.
One thing to remember. It is only in the grade keeping system that student groups
are established. You need to include yourself in one of the groups so that you can
utilize the group profiling method. This way you can also test the quiz process.
All the forms utilized are HTML programs and are not directly accessed or changed
by the user. Rather a method has been established that permits users to enter
lists of basic elements, achievement steps, and student achievements. These are
then integrated into the HTML programs for presentation on the computer.
In the procedure description it says to exit the program you need to press the
(X) button on the top line or press the ESC key. You can eliminate this step by doing
the following for each different application that requires this procedure.
When the flag appears at the end of the process, first of all click on the font symbol
on the top line and change the font to 10 by 18, then right click on the top line and
select properties then check the box which says CLOSE ON EXIT.
This is an open ended programming capability. While the list of information become
part of the program, the user need not know anything about the language since you
will only be responsible of the elements be they achievement steps, basic elements
such as definitions, HIERARCHICAL charts in the form of JPG images, or specific
achievement for each student in a class or being tutored. The IET system will
handle the integration within the program.
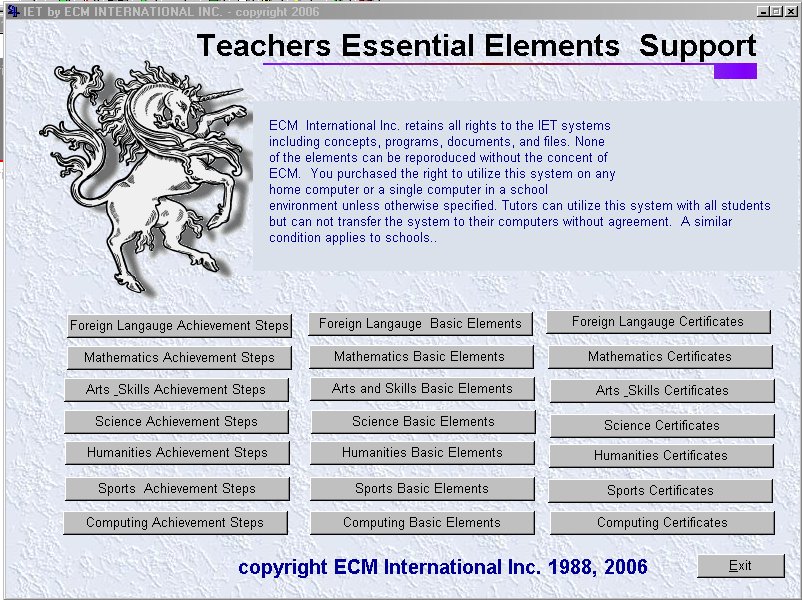
The teacher support menu is to complicated to describe without a picture. The following
image is the support menu for the Achievement steps, HIERARCHICAL structure & basic elements, and Achievement Certificates.
DISPLAY/UPDATE IET USER LIST
For a student to utilize this system, he or she must be entered into the profile
list. You need to print this list to support your selection of propagation of
profiles. It is basically a text file which controls entry into the system.
You will be required to enter the following entries separated by a comma:
DISPLAY/UPDATE IET SUBJECTS
RUN STATISTICAL REPORT FOR STUDENT
With this facility you can either run a statistical report for a student or
delete some or all the statistics for a student.
Each time a student works in the LEARNIT process of the system, statistic are kept
as to how well that person did. You will be able to see how many times the student
worked on a given subject and tell what the average percent was. In fact you could
use this to grade a student without ever checking any papers. If a student does poorly
initially he or she can improve her percentage by working more and thus averaging to
a higher grade. the more a student utilizes the system the more he or she will master
the subject.
DISPLAY/UPDATE IET CONTROLS
PERSONALIZE THE IET SYSTEM
When a student uses the system, you can set it up so that he or she sees a
welcoming message to greet that student. Furthermore you can specify the system
to play Happy Birthday for that individual on his or her birthday. There are
samples provided and the procedure is fully described as part of the controls.
After you make an entry or change the message simply press the ESC key and your
changes will be saved.
PRESENTLY ACTIVE LANGUAGE CODES
You can have up to 7 languages that can be studied by a student or set of
students. The system can support up to 9 languages on a single computer. The
system comes with 7 languages already provided for you. You can add two more
provided you develop the learning control files. This process will be
described later.
PASSWORD ENTRY
You can add a second line and more lines if you wish that others can control this
system as well as you. Each entry will permit that person to access this facility.
For ease in remembering the password, we suggest you use part of your Social Security
Number. It is suggested that you remove the initial 1111 entry. Lets say that both
Mrs. Jones and Mrs. Grant use the system and can have access to the controls. Your
password entries could look like this:
Press ESC key and the new entries are made and either person can access the IET
Control System.
VIDEO, AUDIO & IMAGERY CONTROL
There are only two entries in this control file. It is originally set as follows:
LANGUAGE SUPPORT DOCUMENTATION
Originally the language support documentation update facility was provided in this
section. We found an easier way to support this facility.
If you have created a new language set using the propagation facility for languages,
you need to make an entry in the SYSTEM CONTROL FACILITY.
Since the system came with seven languages, the next one would have been 18.
PERSONALIZED AUDIO RESPONSES
Is is really important to have different messages for different students appropriate
to their age, gender, and race.
PROPAGATE/DELETE STUDENT PROFILE
STUDENT LEARNIT SYSTEM
The Student Learnit System consists of two parts:
In the learning process the student utilizes the system to learn concepts,
processes and word definitions. In the development process the teacher or
support staff develops the elements for each educational endeavor. Some are
preset when the system is installed although everything is at the control
of the teacher or administration. If this is used in a school environment,
it is advisable to hire a support person to do this.
THE DEVELOPMENT PROCESS
All menus, all word lists, all definitions, all audio, video, and graphic
support can be changed or used as is. This system can grow tremendously.
It can grow by the gigs and not just in millions of bytes. I believe that
individuals and schools can share video, audio. and graphic presentations.
Educational companies can contribute to this system as to images, audios,
and videos. The interface is very simple. All that is required is that the
image file, audio file, or video file has the same name as the item in
the learnit group. Example if the word is electron, then the image file
needs to be electron.bmp, If it is an audio file the name must be electron.wav
and for video electron.gif or electron.mpg. These files upon receiving them
are placed in their respective directories to be used in the system.
These three sub systems can not be modified with the exception of the automated testing
and lesson planning process. This is totally under the control of the teacher.
These ideas and procedures will be discussed in the next section. In all of these three
sections only the data can be changed in support of teaching requirements.
LOG OF CONTROL AND DATA FILES
First of all the IET system is primarily a management system
in support of educational processes. It was not intended to provided a total ideal
educational system. This will take time and many contributions from teachers,
professors, scientists, and educators as the system is introduced to various
educational and business communities. Therefore all the areas of study listed
along with their subjects and categories will not be complete. In fact you will
see a display saying TO BE DEVELOPED.
All menu control files start with IET. The next number is the area of study number.
We have concluded that there should be up to seven areas of study supported at
any one time in any given computer. This opens up the possibility for more.
and now the Primary Set would list a series of data files:
In setting up your structure you must follow a specific conventions for:
For menu names, the first three letters must be IET. The next character must be
the area of study number. The next character must be a letter starting with A and the further
you go down a chart the further you go down the alphabet. The next character must be
a subject number (in base 16) so F could be considered a number 15. You can expand
the name by two more characters, the first being a letter and the last being a number.
This pattern should provide adequate configuration capability.
Following the acronym should be a number in sequence as you need them. it does not
matter if you use 01 or 001 as the start. If you decided to use 01 and get to 99,
you still can go to 100, 101 etc. For the sake of keeping things aligned in your
log, it is a good idea to use 001. It is highly unlikely that you would get to
999 on a given subject.
BUILDING SUBJECT MENUS
With the log list in front of you, you are now ready to customize your system
for a specific student or students. If you are satisfied with the way it is
already set up you can simply proceed to use it.
Of course if you had selected Mathematics the options would reflect the
area of study selected. You would choose DEVELOP LANGUAGE SYSTEM.
This will bring you to the IET development screen. This menu has the following
options:
You will select option A. Of course you can select option (D) and review the
process first.
Again you have the chance to review the procedure before proceeding
by choosing option (A). Now based on your selection of 4 or 7 entries
in a menu that was formulated in the log file, you will choose option
B or C.
First of all it would be good for you to print out the log file for science which
has the subject of Astronomy. Lets say that while the log file is set up the menus
have not been set up yet.
For item (G) you entered NEXT SET OF PLANETS because of the 7 line limitation. Later you
will build another menu control module IET4B4A Which would look like:
After you have pressed ENTER with the last line item the program
will update your control module and ask you if there is anything else to be done.
BUILDING CATEGORY DATA
Once you have defined the categories for a subject in an area of study in your log you
then have proceeded to develop the menus in support of them. The next thing to do is
build the learning word sets. You could consider these as help cards of the past. On one side is the word and on the other side is the meaning. The same applies here. On one side of the
screen are all the words in a category and on the other side is a full description of one
of those words. The descriptions are randomly selected and on the bottom of the window you
must enter the word that fits the definition. If one does it correctly you will get a positive response otherwise you will get a negative response. Statistics are kept for each student.
After proceeding through at least 12 different words, a statistical report will be displayed
for the student. These statistics will be stored for the student.
You will select DEVELOP SCIENCE SYSTEM and this will go to the following menu:
Now if you forget how to do something you simply can go to the PROCEDURE DESCRIPTION first
and then select BUILD QUESTION & ANSWER FILE.
First of all, you will not use the move and copy process in the IET system so we will not
discuss them. Printing is obvious if you want a hard copy. Update paragraphic header is
simple. Just enter a new paragraphic heading when prompted. You will only use this is you
misspelled the heading. This leaves only Editing and deleting paragraphic word or phrases.
By the way WORD may also mean a PHRASE.
SETTING UP SUPPORT MEDIA
There are three areas of supportive media capability that can be included into this system
and the system will recognize them and play it for the student at the start or end of any
study effort. It is a simple process of properly naming the media and storing it in the
appropriate sub directory of the IET system. They are three support media's:
if you wish to add an audio, it must be stored in IETCOM\XX where XX is the acronym
for the language that it supports. Note audio support is only provided for languages
excluding English. You must store it in that directory with the following format:
In this case lets say you want to store an audio presentation for pronouns in Russian.
The system log support file shows the name RU04 thus the support audio must be
called RU04.WAV and stored in IETCOM\RU sub directory. Currently all the audios
for Russian have been pre loaded. It is our intent to do so with all the langauges
supported. It should be noted that if you know a langauge well, you can replace
an existing audio with your own.
Lets say it was for Spanish pronoun category which has a file called SP04 which is
logged in the system control file. The video would be called SP04.MPG.
We have selected MPG as the only format we will support since the size of
videos is greatly reduced over AVI. Most video software will give you an option
to do either. Now the video will not play unless the student achieves 90% or better
in his or her learning drill. So for videos support, they video will play after
the student has completed the LEARNIT task.
In this case lets say it was about
the planet Mars. The associated file for Mars from the Science log file is
AS05 so the imagery program name would be AS05.EXE
If you built it, store it with the proper name, it will be displayed after a
prompt when you select any subject in the system. In other words, the system
checks to see if you did when you select a subject from the area of study
menu. All the languages and Arithmetic and Algebra currently have an example.
SPECIAL IET APPLICATIONS
There are special applications that are developed and preset. While they are developed,
you still have the options of modifying the data. These specialized applications are:
All three are basic skills that are very important for everyone these days and being able
to perform these tasks effectively will be highly beneficial.
It gives the user the option to decide which number set to work with from 1 to 9.
The teacher or tutor can at any time change the selected list that is in these control
files. First select ENGLISH & SPEED READING then DEVELOP ARTS SYSTEM then BUILD QUESTION
and ANSWER FILE. The controls were designed in the same way as all the other question
and answer files for ease in processing. The only difference is that you only have
TWO paragraph entry called:
Enter (A) to display the current list. You can now change that list.
Enter (B) to display the delay factor. You can now change that as well.
Press ESC key and the changes are applied.
THE LEARNING PROCESS
When within an area of study and subject is established by menu design and the category data files have been built, and the supportive media files copied to the proper directories, the student can now utilize the system.
ARITHMETIC DRILL
In arithmetic there is a drill preset and does not require any development and is ready to use. It also will maintain statistics on each student. You have an adding, subtracting,
multiplication, and division drill. The student must decide which number set to review.
TYPING DRILL
In typing, the system is also preset. To select typing you will first select ARTS & SKILLS
area of study and then TYPING. When the typing menu displays you will see:
The first four drills have no timing element while the last three do. For level 1
the acceptable speed is 10 WPM, for level 2 it is 30 WPM, and for level 3 it is
50 WPM. If you achieve the speed posted or more you will get 100% otherwise it will
be calculated.
ENGLISH & SPEED READING DRILL
In the ARTS & SKILLS section there is the subject of ENGLISH & SPEED READING.
We feel that there are three basic skills that need to be mastered by all students
to be successful in any educational venture. They are arithmetic, typing, and reading.
You will be using these skills all your life. These all can be taught in the first
grade. This is why the saying goes "All you need to know for life, you learn in the first grade."
Now the English language has over 470,000 words. In the foreign language category we
select about 3,500 words that a student should master as a basis for further expansion
of the language in actual communications or readings. Thus in English we only make sure
that the student understands each of the grammar words and then provides for the
parent, teacher, or tutor, three groups of word sets each have a menu of four sub
groups that can be used or expanded as need be. This is totally under the control of
the teacher and is not preset as the foreign languages are.
TEACHER SUPPORT SYSTEM
The IET support applications for teachers or tutors are:
To access the Teacher Support System you must enter the password that you set
up in the IET system controls. This is important since you do not want any
of the students to access these applications. When you enter the password, If correct
it will ask you to enter the group code for which you will be working on. The
system will load your C~GATES sign on entry and use those initials and group code
to load the appropriate profile.
When you exit it will save your profile in the event that you may change anything.
The system checks the MASTER FILE for the IET system to verify that you are an
administrator before proceeding.
TEACHING ESSENTIAL ELEMENTS
The Teaching Essential Elements are:
While the part, level, and area of study achievement certificates are fully
functional for all 7 areas of study, the achievement steps, HIERARCHICAL structure,
and basic elements have been developed for certain disciplines only. The intent
is to provide examples of the way the educational goals should be so that teachers,
and educational professionals can create their own set. As time permits more and more
of the essential elements will be developed by ECM depending on the support that
we would obtain from this program.
ACHIEVEMENT STEP PROCESSING
All the achievement steps are stored in HTML format for ease in printout and display. Each part of a level constitutes a page. Each part has two sections. Each section constitutes the lesson plan elements for a given week. Thus in a lesson plan reference is made to these achievement steps: Example Arithmetic level 1 part 1 section 2. You can also go one more level. Each Achievement step has a letter associated to it. Example: Typing level 2 part 2 section 2 J,K,L.The primary purpose for this facility is to provide the teacher with a display and printout capability of the subject level, and part essential elements that he or she is working on. On the other hand you can make changes to these achievement steps as well.
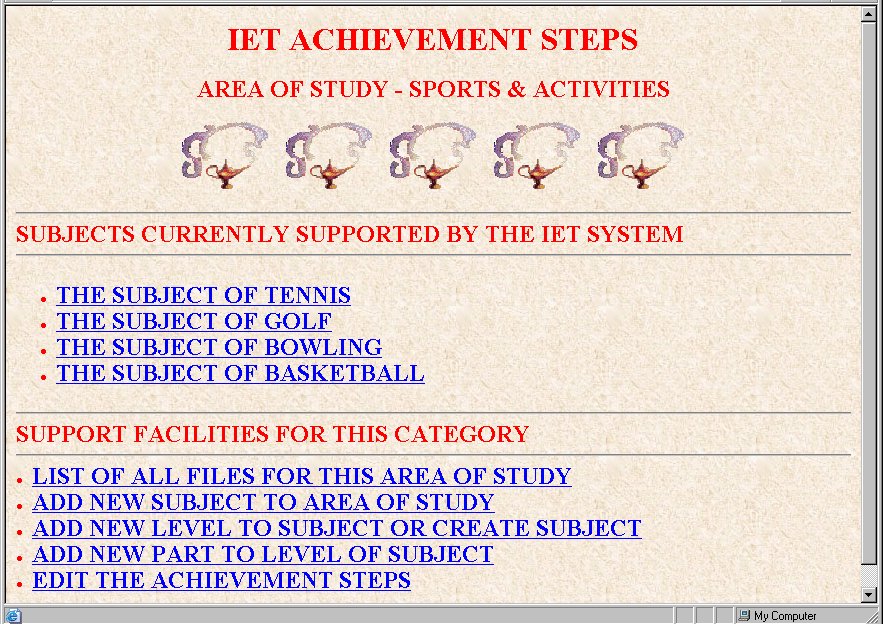
First let us discuss the support facilities provided for Achievement steps. They are:
- LIST OF ALL AREA OF STUDY FILES
- ADD NEW SUBJECT TO AREA OF STUDY
- ADD NEW LEVEL FOR SUBJECT OR CREATE SUBJECT LIST
- ADD NEW PART TO LEVEL OF SUBJECT
- EDIT THE ACHIEVEMENT STEPS
LIST OF ALL AREA OF STUDY FILES
You can create the file name for each achievement part of a level of a subject. The file name has to follow a specific format where x,y,and z are variable:- IETxAyz => STANDARD FORMAT
- IET => STANDARD
- X => AREA OF STUDY NUMBER
- A => ACHIEVEMENT STEPS CODE
- Y => SUBJECT CODE
- Z => SUBJECT ACHIEVEMENT STEPS SEQUENCE CODE
- IET6A0 - SPORTS AREA OF STUDY
- IET6A1 - TENNIS SUBJECT
- IET6A1A - 1st TENNIS ACHIEVEMENT STEPS
- IET6A1B - 2nd TENNIS ACHIEVEMENT STEPS
- 10 - FOREIGN LANGUAGES
- 20 - MATHEMATICS
- 30 - ARTS & SKILLS
- 40 - SCIENCE
- 50 - HUMANITIES
- 60 - SPORTS
- 70 - COMPUTING
- 61 - TENNIS
- 62 - GOLF
- 63 - BOWLING
IETxBy
ADD NEW LEVEL FOR SUBJECT OR CREATE NEW SUBJECT LIST
Once you have done the previous two steps you are 95% complete with the procedure since every procedure is basically the same. You make an entry to a list. You point to an entry using the (=) symbol. The system program does all the difficult tasks for you. The only difference is the area of study selection, whether it is an achievement step entry, essential element entry, or certificate, all are handled the same way. Make an entry, point to it, and walla its done.Again taking the Sports Example. You have created a new subject of BASKETBALL. It appears on your SPORTS area of study window. You now want to create a subject list which will include all the Achievement Steps levels and parts that will be developed.
From the sports menu you will select ADD NEW LEVEL FOR SUBJECT OR CREATE NEW SUBJECT LIST. This will display the list you added to. It is the Sports area of study log. This time you will position to the line which has IET6A2 THE SUBJECT OF BASKETBALL and press the (=) key. You will get the message that your request has been processed. Exit the program after pressing the enter key. Now you can click on the line which has BASKETBALL as one of the subjects in the SPORTS area of study. The program will display the Basketball subject list which will only have LEVEL 1 in it.
On the other hand lets say you have completed entry of all three achievement step parts of level 1 and which to establish another level. Follow the procedure exactly as previously stated. The program is smart enough to know that the next level will be LEVEL 2 and add that to your list.
One other item. The text editor is a little different then most text editors. To learn about the text editor features, please press the F1 key for a table of contents which refers to the other function keys which will provide you information about the edit process. You need to be in the editor of course to use the function keys.
Now you are ready to add the achievement step parts.
Now you are back to the SPORTS area of study menu. You can now select Basketball. This
will display the Basketball subject list and in it will have LEVEL 1 and a PART 1.
By clicking on PART 1 a new window will display the achievement steps which will only
have the letters for each achievement step that you will be entering. This is just the
display and you can not update it. If you had completed entry you would see the
achievement steps. That will be explained in the next step.
Now if you click on BASKETBALL in the SPORT AREA OF STUDY menu, you will access
the basketball list program and if you click on the LEVEL 1 PART 1 option you will
see the achievement steps that can be viewed or printed.
Note that as we go on to HIERARCHICAL chart, basic elements, and certificates of
accomplishment, the process is very similar.
This section will not be as graphic as the Achievement Step procedure. It is
almost identical so be sure to understand the Achievement Step procedure first.
ADD NEW PART TO LEVEL OF SUBJECT
Now you are ready to add a new part to a level of a subject. This will permit you
to entry achievement steps into two sections of a single page document. The process is
similar to the previous. You will select ADD NEW PART TO LEVEL OF SUBJECT which will
display the list of achievement step files that you have set up for a particular subject
within a given area of study. You will position to the line with the part that you wish
to establish. lets say: IET6A1A BASKETBALL LEVEL 1 PART 1. When you press the (=) key an
entry is first made into the subject list html program and then a new html program is
created specifically for the part of the level that you requested. You will get a message
that your request was processed. Press and key and then exit the program.
EDIT THE ACHIEVEMENT STEPS
Now you are ready to either enter the achievement steps or edit the achievement steps.
From the SPORTS AREA OF STUDY menu you will select EDIT THE ACHIEVEMENT STEPS. Again
the file list that you established or was established for the SPORTS area of study
will be displayed. You again will position to the line of the achievement steps that
you wish to edit and press the (=) key. Now the program will access this program file
and extract the achievement steps and place them into a text file for ease in editing.
This file will be displayed for you to enter or correct achievement steps. Once complete
you will press the ESC key. A message will appear and you will press the ENTER key to
save the changes or (N) key to discard changes and then exit the program.
HIERARCHICAL STRUCTURE & BASIC ELEMENTS
Note that as we go on to HIERARCHICAL chart, basic elements, and certificates of
accomplishment, the process is very similar. First of all when you use any features
and the task is finished, a U.S. flag will be displayed. If you press ESC again you
will return back to the primary menu. On the other hand when the flag appears the first time
you can right click on the top line and select properties and specify to close the
application automatically. You can also select the Alpha letter on the top line and
change the font to 10 by 18.
Here again the system is designed to provide the tutor or teacher as well as the student all the basic information that is to be mastered. If the subject is not to deep in detail then the elements will be based on the HIERARCHICAL structure elements. On the other hand if subject is deep in detail then the elements will be based on the grade level that you are teaching.
Lets review this concept a little. Consider Mathematics. In grade 1 Mathematics is a study of Arithmetic. In grade 3, Mathematics is a study of Arithmetic and Algebra. In grade 6 Mathematics is a study of Arithmetic, Algebra, Geometry. In grade 9 Mathematics is a study of Arithmetic, Algebra, Geometry, & Trigonometry. In grade 11 Mathematics is a study of Arithmetic, Algebra, Geometry, Trigonometry, and Calculus. In college the details of each is expanded to incorporate the total scope of mathematics.
Now students must be advised that the definition of mathematics will change as they proceed through the grades to incorporate more categories and detail. Parents must also be advised on this teaching technique. You don't want parents to come to you and say well that isn't correct!
Lets look at Tennis and Foreign Languages. For tennis the files that you will set up for the basis elements will be based on the elements shown in the HIERARCHICAL structure. For foreign languages the basic elements due to the scope of each language will be based on the part and level method of entry. Thus for foreign languages you will specify parts of a level for files and each file will have the elements defined for study in the achievement steps.
You never want to overload the student's mind. If you tell the student that you are going to study the Russian language and here are the 5000 words and 50 readings that you will have to learn, most students will cancel the class if they can. On the other hand if you say to a student here are the 150 words and 3 readings and verb grammar that you need to master +for Russian for part 1 of level 1. Lets get started, you will not loose a single student.
Again ECM has no intent to provide a complete HIERARCHICAL structure and basic elements for each subject of an area of study. Rather it will provide examples which in turn can also be modified. This is a management tool that is to be used by the school administration in completing those areas taught.
It is also not the intent of ECM to rewrite any books. What the IET system does is set up a management system that provides for the basic elements of knowledge for a given subject. It is the responsibility of book publishers, teachers, and tutors to provide the basis for understanding these elements. In other words you first must know that which is to be learned and 2nd to understand them. For a book to be in conformity with this method of learning, it needs to be rewritten to the levels and parts defined. This will not happen for a long time so teachers must analyze the manuals provided and selectively script out the readings in accordance with the levels and parts achievement steps.
In foreign languages knowledge is understanding so the total scope is provided. Yet it takes a teacher or tutor to provide the environment for learning.
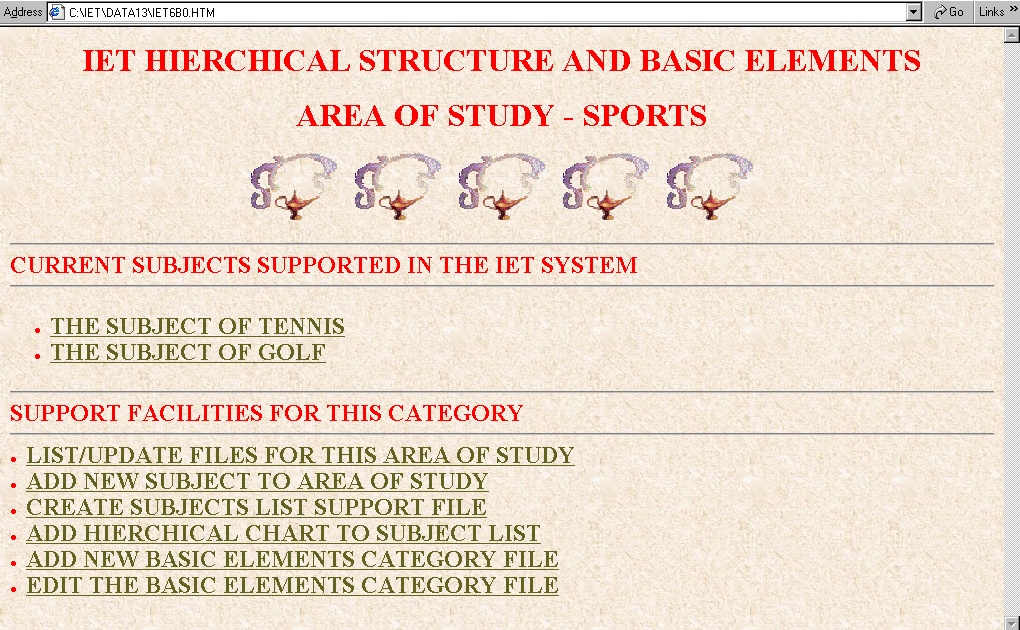
First let us discuss the support facilities provided for Achievement steps. They are:
- LIST/EDIT FILES FOR THIS AREA OF STUDY
- ADD NEW SUBJECT TO AREA OF STUDY
- CREATE SUBJECTS LIST SUPPORT FILE
- ADD HIERARCHICAL CHART TO SUBJECT LIST
- ADD NEW BASIC ELEMENTS CATEGORY FILE
- EDIT THE BASIC ELEMENTS CATEGORY FILE
LIST/EDIT OF ALL AREA OF STUDY FILES
This function provides you to review the list of support files for each subject of an area of study as well as add additional entries to the list.You can make an entry of the file name for each HIERARCHICAL structure and basic elements category of a subject. The HIERARCHICAL structure html file is also the basic elements category list file. The file name has to follow a specific format where x,y,and z are variable:
- IETxByz => STANDARD FORMAT
- IET => STANDARD
- X => AREA OF STUDY NUMBER
- B => HIERARCHICAL STRUCTURE & BASIC ELEMENTS CODE
- Y => SUBJECT CODE
- Z => SUBJECT BASIC ELEMENT SEQUENCE CODE
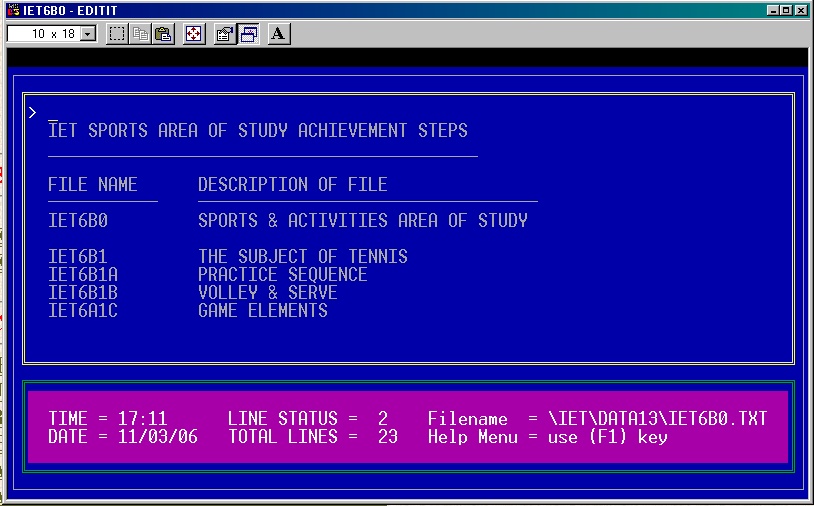
Thus all HIERARCHICAL structure and basic element list files have the format
- IET6A0 - SPORTS AREA OF STUDY
- IET6B1 - TENNIS SUBJECT HIERARCHICAL CHART AND BASIC ELEMENT LIST
- IET6B1A - PRACTICE SEQUENCE
- IET6B1B - VOLLEY AND SERVE
- IET6B1C - GAME ELEMENTS
Now we do not differentiate between tutor or teacher. Thus when we refer to tutor we also include parents and teachers.
To review the list of files for hierarchical structures and basic elements you will select from the menu above LIST/UPDATE FILES FOR THIS AREA OF STUDY. This function will provide you a list in text mode which includes the file name and description. If you are adding new files you must follow the name structure provided above. You then can press the tab key and enter the description.
If the entry is for a subject list and HIERARCHICAL structure then you must enter the description as follows: THE SUBJECT OF WHATEVER. Where whatever is the subject name. Now basic elements will be split up into categories and each category will have a file with the sequence letter incremented. Be sure to provide a short description since it will become part of a descriptive html program.
When done press ESC key and if everything is OK, press the ENTER key as prompted. The
top line of the window will show FINISHED. Press the (X) to exit or ESC key.
To add a new subject file and html program you simply select ADD NEW SUBJECT TO AREA OF STUDY.
This will display the area of study file list. You then position to the file that you entered
for the new subject which has a description of THE SUBJECT OF subject name and press the (=) key. You will see the message that your request has processed. A new subject will be listed
in the area of study menu that you selected. To see it you have to restart the program.
If you click on it since it is underlined you will not get anything since the program
that it will access will be built by the next step.
In the following example we want to add the subject of Bowling so we position the
cursor to IET6B3 THE SUBJECT OF BOWLING and enter an (=) symbol and walla, the
primary menu will have BOWLING entry.
ADD NEW SUBJECT TO AREA OF STUDY
When you make an entry into the area of study menu for a new subject simply
establishes the entry in the list of subjects currently supported by the IET
system. It does not create a subject list or support file at this time.

CREATE SUBJECTS LIST TO SUPPORT FILE
This function gives you the capability of add new category basic elements files to a established subject in an area of study. You simply click on CREATE SUBJECTS LIST TO SUPPORT FILE. This will display the list of files for the given area of study. Position to the line having the basic elements category that you wish to add using the down arrow or ENTER key. Then press the (=) key. Initially you will get a display that looks like the following which was set up for Bowling:

First select ADD HIERARCHICAL CHART TO SUBJECTS LIST. You will again have displayed the
list of files for the area of study selected. You will again position to the line that
has a file name and the name of the subject IE THE SUBJECT OF GOLF. You again will
press the (=) key and a mini menu will appear asking you to provide the HIERARCHICAL chart
file name and location. As an example in the previous paragraph to build a HIERARCHICAL
chart for golf so you would enter c:\GOLF.JPG since you stored it in the primary
directory of the C drive.
The program will copy it to the IET system and rename it consistent with the selected
entry that you made in the area of study list. You will receive a message that your
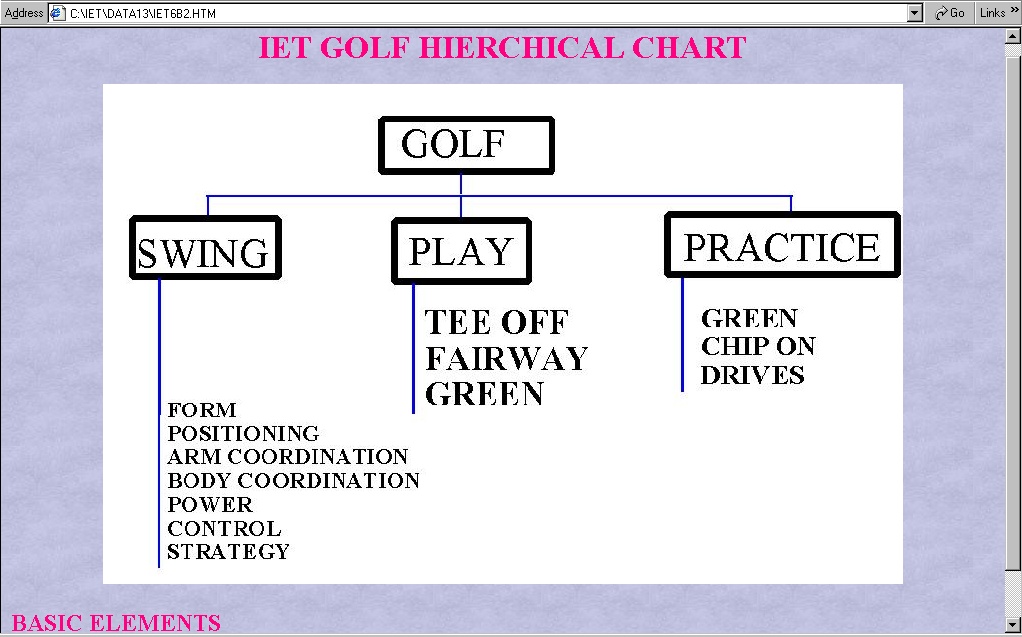
request was processed. Now when you select GOLF you will get the following display:
ADD HIERARCHICAL CHART TO SUBJECTS LIST
Now that the subjects list program has been established you will need to
add the HIERARCHICAL chart to it. First of all you need to design it and save it as a JPG
file. You can build it with any document generator and then capture the image using
EASY SCREEN software. It is best to save it to C drive and give it an appropriate name.
Keep the name to 8 characters or less. If it was for golf you could call it
golf.jpg. Now you are ready to transfer it to the IET system.
ADD NEW BASIC ELEMENT CATEGORY FILE
When you added the basic element category entry to your subjects list using the
standards provided for naming the file, you did not create the
html file for viewing of editing. This step is required to actually create the html
program file. If you have not done so yet, you need to use the LIST/UPDATE FILES FOR
THIS AREA OF STUDY. In this case we will use TENNIS as an example. First add the
entries as shown below:
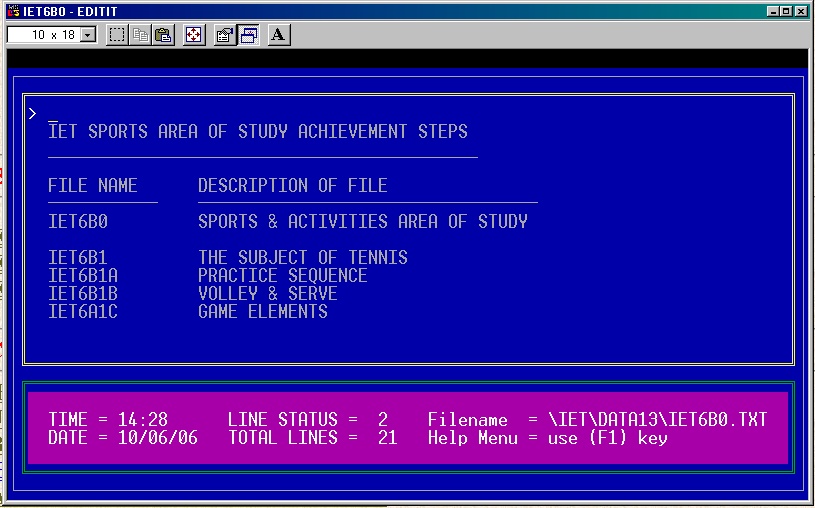
Then you will select ADD NEW BASIC ELEMENT CATEGORY FILE from the area of study support menu. This will again display the area of study file list as shown above. This time you will position to the first basic element of Tennis which is:
- IET6B1A PRACTICE SEQUENCE
- IET6B1B VOLLEY & SERVE
- IET6B1C GAME ELEMENTS
When you have completed this, you can now click on THE SUBJECT OF TENNIS:
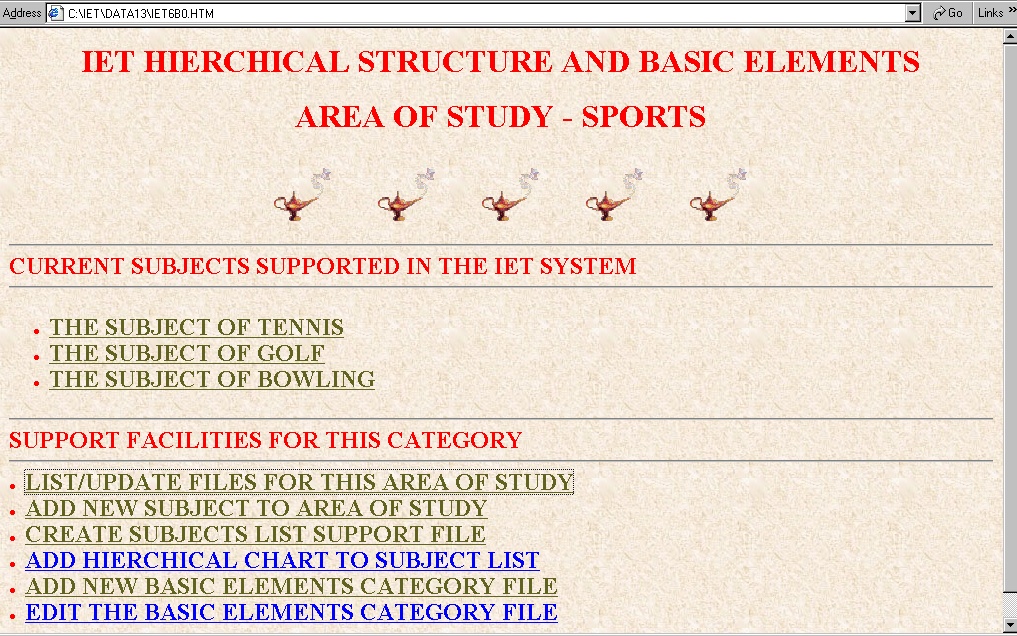
and you subjects list will now look like the following since all three of your basic elements have been added:
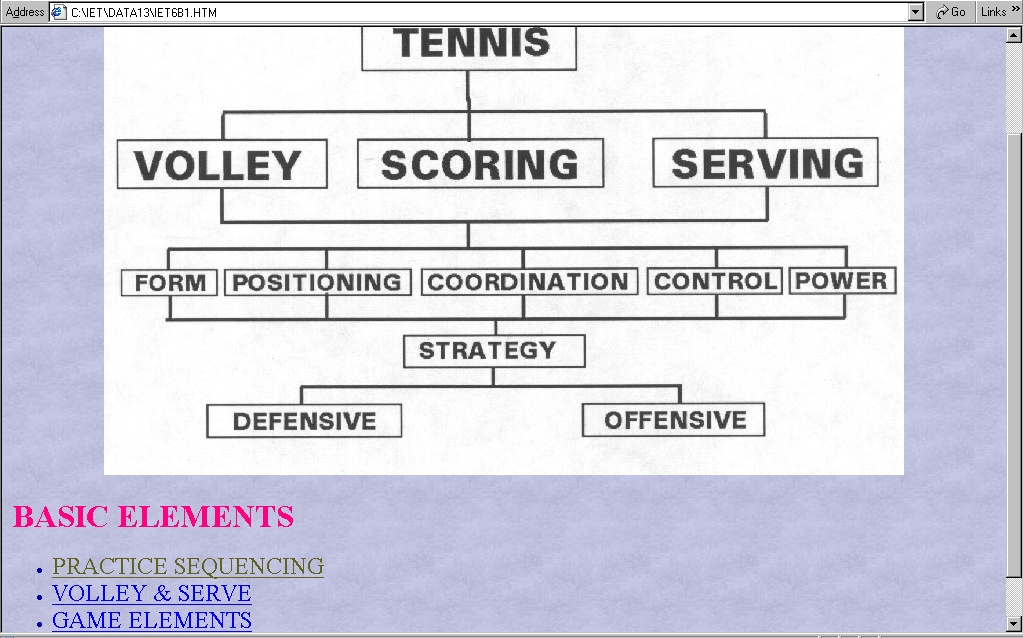
Now if you click on PRACTICE SEQUENCE from the above menu, you will get a blank text file such as the following:
You will need to enter the information concerning this category as to the basic
elements to be taught. As time passes, more and more of
the basic elements will be provided by ECM. Now the HTML file is built so you
will need to use EDIT THE BASIC ELEMENT CATEGORY FILE to make the necessary entries.
Again the area of study file list will be displayed as is the case for all functions.
You will position to the BASIC ELEMENTS CATEGORY file that you wish to edit and
press the (=) key:
EDIT THE BASIC ELEMENT CATEGORY FILE
Since the file you have created it an html program you can not edit it directly. By
selecting EDIT THE BASIC ELEMENT CATEGORY FILE you have requested to extract data from
the program and place it into a text file for editing. When done you will press the
ESC key and then the ENTER key to save changes back into the html program.

For this example we will choose the IET6B1B VOLLEY & SERVE so we will place an (=) symbol on that line. The following text file will be entered:
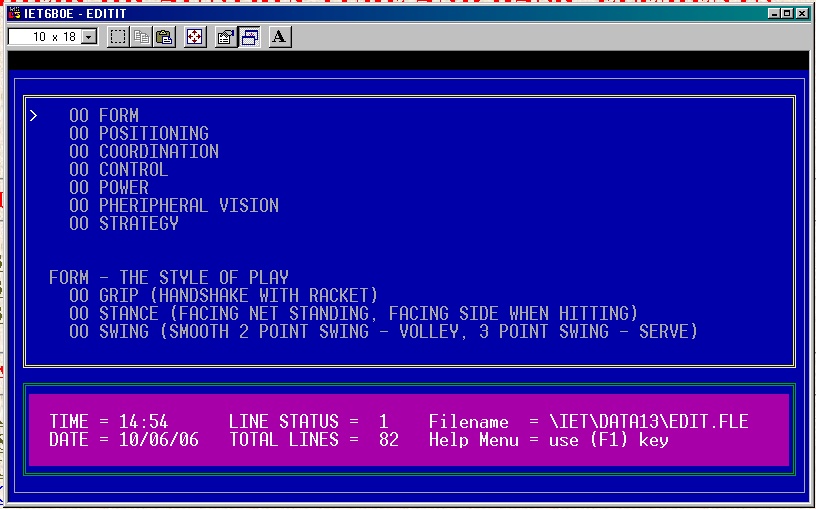
Once complete with entry we will press the ESC key and respond to the following question by pressing the ENTER key. Now when we select from the primary menu THE SUBJECT OF TENNIS we get:

When you select VOLLEY & SERVE you will get the following display:

This way the basic elements are ready for viewing in a professional manner and
can also be printed.
------------------------------------------------
All the Achievement Certificates are stored in HTML format for ease in printout and display. Now in this case our area of study file list consists of all student files. You will be able
to:
There are three types of certificates that can be printed.
The primary purpose for this facility is to provide the teacher with a display and
printout capability of certificates of achievement for the students as they
complete a major educational effort. This process is basically the same as those
for the ACHIEVEMENT STEPS and the ESSENTIAL ELEMENTS. First we will display
the menu's for Certificates of Achievement:
CERTIFICATES OF ACHIEVEMENT
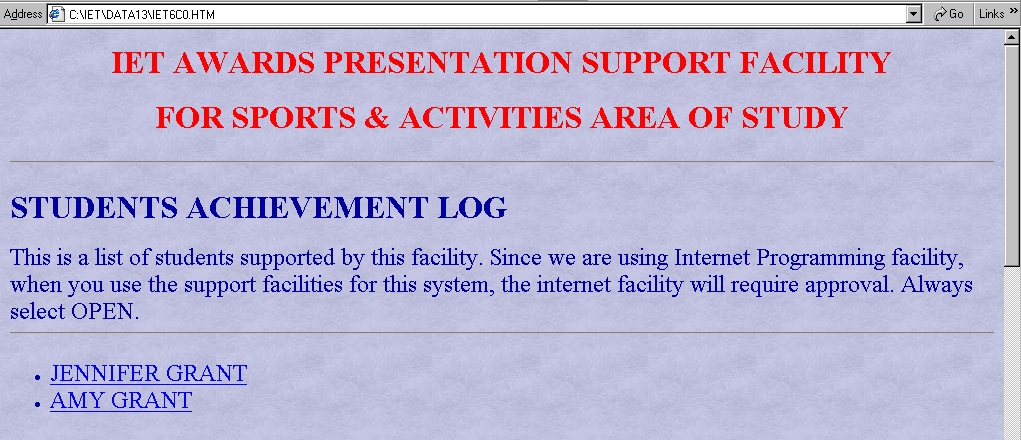
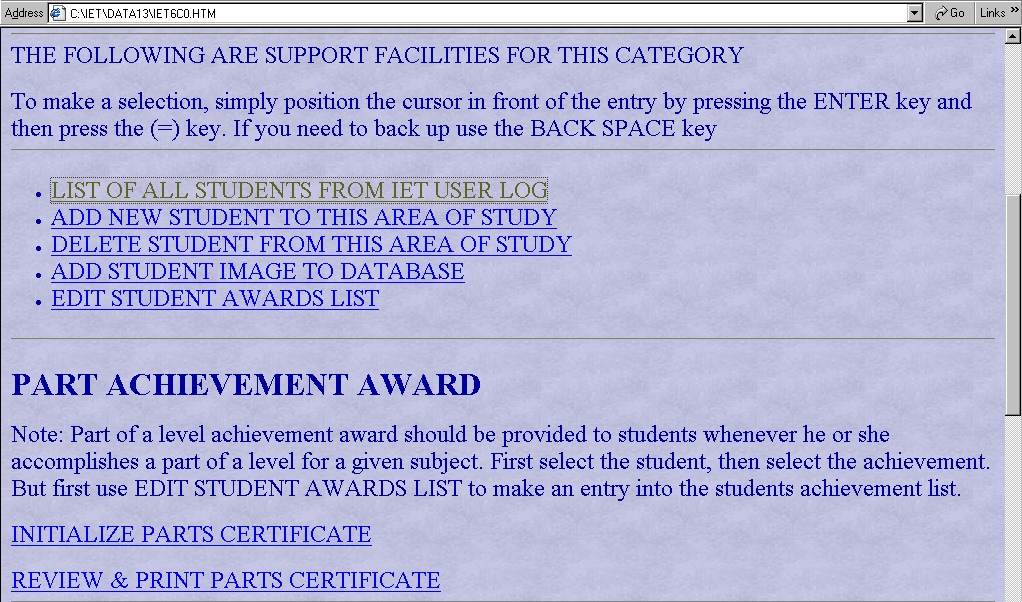
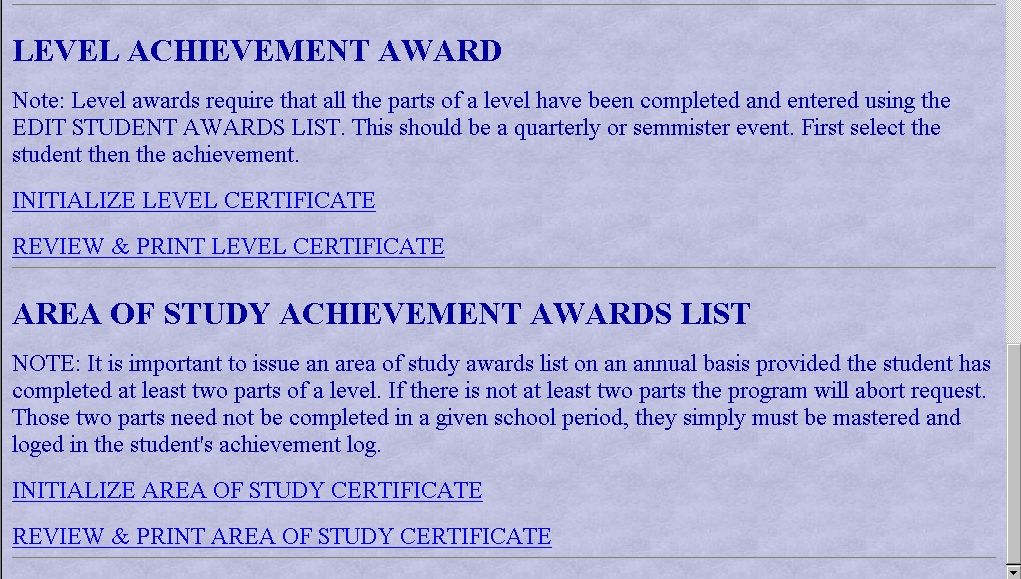
- LIST OF ALL STUDENTS FOR THIS AREA OF STUDY
- ADD NEW STUDENT TO THIS AREA OF STUDY
- DELETE STUDENT FROM THIS AREA OF STUDY
- ADD STUDENT IMAGE TO IET DATABASE
- EDIT STUDENT AWARDS LIST
- INITIALIZE PARTS CERTIFICATE
- REVIEW & PRINT PARTS CERTIFICATE
- INITIALIZE LEVEL CERTIFICATE
- REVIEW & PRINT LEVEL CERTIFICATE
- INITIALIZE AREA OF STUDY CERTIFICATE
- REVIEW & PRINT AREA OF STUDY CERTIFICATE
LIST OF ALL STUDENTS FOR THIS AREA OF STUDY
This is actually a list of student names and their files. When you select this option the system will rebuilt the file using the entries in the IET user list. The IET user list permits the system to limit the use of the system to select users. This procedure also establishes a means for logging statistics of the activity of each user.
Whenever you make a new student entry, you should activate this function. It is
available in all area of study as well as the parent/student support system. There is
no need to make an entry to this list. The list is displayed for information purpose
only. You will need to press the ESC key to exit the display of students and their
respective passwords. The password is a combination of the student's initials and
the last four positions of their telephone number.
While you have updated your student list, you also need to update the HTML program
that support the ACHIEVEMENT CERTIFICATION for a given area of study. After you have made an entry for the student you can select it and a picture of that student will appear and a list of all his or her accomplishments will be displayed for that area of study. For this to work you will have to proceed through a series of easy steps similar to Achievement Steps and
Basic Element processing.
To add a new student to the Achievement Certification menu, select ADD NEW STUDENT TO
THIS AREA OF STUDY. This will display the current list of entries. Press the ENTER key
until you position to the student you wish to add and then press the (=) key. You will
receive a message that your request has been processed. Press the ENTER key and
a FINISHED message will appear in the top line of the application window. Press the
(X) to exit program or ESC key.
Now if you exit the Achievement Certificate program and return you will see the name
of the new student on the menu. If you click on that name since it is underlined you
will get a blank student profile menu. You need to proceed to the next two steps
to add the students picture and achievements.
ADD NEW STUDENT TO THIS AREA OF STUDY
DELETE STUDENT FROM THIS AREA OF STUDY
If a student leaves your class or you are getting ready to teach a new class, you
will need to delete the entries from the Awards List. To do so select
DELETE STUDENT FROM THIS AREA OF STUDY. Again position to the student that you
wish to delete and press the (=) symbol. You will get the following message:

ADD STUDENT IMAGE TO IET DATABASE
First of all you need to load the pictures of your students into the computer preferably into the prime directory of the C drive. You need to know the name of the JPG image file for each of the students that you will be loading their picture for. You will select ADD STUDENT IMAGE TO THE IET DATABASE. You will have a display of all your students files and names that you have entered. Again position to the name of the student that you want to select. Press the (=) key and this time the program will ask you to provide the location and name of the jpg file. An example if loaded in the C primary directory would be C:\IMG0356.JPG.
If the name is valid and the location is valid you will get a confirmation that the image has been renamed and transferred to the IET database. If one of the entries is incorrect you will get a message that the entry was incorrect.
The students picture can always be changed by repeating this process. The picture is important since you will be using it in printing his or her achievement certificates.
Now you either need to enter new awards that the student achieved or edit the ones that
are there. Once you do this when you click on the students name you will have both the
students picture and the achievements listed.
To do this you first select EDIT STUDENT AWARDS LIST. This will first display the student
list for this area of study as is the case for all support functions. You will then
position to the line with the students name by pressing the ENTER key. At the students
line you will again press the (=) key and now a list of that students achievements
will be displayed. If this is the first time it will be a blank text file with a sample
entry. You will replace the sample entry with your first achievement. If not you will
simply make a new entry in the format shown.
To initialize the parts certificate for a student you first need to select
INITIALIZE PARTS CERTIFICATE. This will first display the student list for the
specified area of study. Position to the student you wish to generate a
certificate for and press the (=) key. This will display the students achievement
list. Position to the achievement that you wish to generate a certificate for and
press the (=) key. The program will tell you that the process is complete. Press the
ENTER key and after seeing FINISHED on the top line of the application window, click on
the (X) to exit or ESC key.
To view or print the PART certificate select REVIEW AND PRINT PARTS CERTIFICATE.
This will display the certificate on a white background since you will insert the proper certificate paper you have selected. If everything looks good, click on the
print icon and the certificate will be printed.
To initialize the LEVEL certificate for a student you first need to select
INITIALIZE LEVEL CERTIFICATE. This will first display the student list for the
specified area of study. Position to the student you wish to generate a
certificate for and press the (=) key. This will display the students achievement
list. Position to the achievement that you wish to generate a certificate for and
press the (=) key. In this case you will select a level and part 3. The program will tell you that the process is complete. Press the ENTER key and after seeing FINISHED on the top line of the application window, click on the (X) to exit or ESC key.
To view or print the LEVEL certificate select REVIEW AND PRINT LEVEL CERTIFICATE.
This will display the certificate on a white background since you will insert the
proper certificate paper you have selected. If everything looks good, click on the
print icon and the certificate will be printed.
To initialize the AREA OF STUDY certificate for a student you first need to select
INITIALIZE AREA OF STUDY CERTIFICATE. This will first display the student list for the
specified area of study. Position to the student you wish to generate a
certificate for and press the (=) key. This will display the students achievement
list. Position to any achievement since the system will include all the achievements
on the certificate and press the (=) key. The program will tell you that the process
is complete. Press the ENTER key and after seeing FINISHED on the top line of the
application window, click on the (X) to exit or ESC key.
To view or print the AREA OF STUDY certificate select REVIEW AND PRINT AREA OF STUDY CERTIFICATE.
This will display the certificate on a white background since you will insert the
proper certificate paper you have selected. If everything looks good, click on the
print icon and the certificate will be printed.
--------------------------------------------------
While lesson planning is much simplified it is advisable for tutors and teachers
to set up a weekly lesson plan. The system comes with a lesson plan set up for
a first grade teacher that has the responsibility to teach the subjects as shown
on the following menu:
EDIT STUDENT AWARDS LIST
INITIALIZE PARTS CERTIFICATE
REVIEW AND PRINT PARTS CERTIFICATE
INITIALIZE LEVEL CERTIFICATE
REVIEW AND PRINT LEVEL CERTIFICATE
INITIALIZE AREA OF STUDY CERTIFICATE
REVIEW AND PRINT AREA OF STUDY CERTIFICATE
TEACHER'S LESSON PLANNING SUPPORT
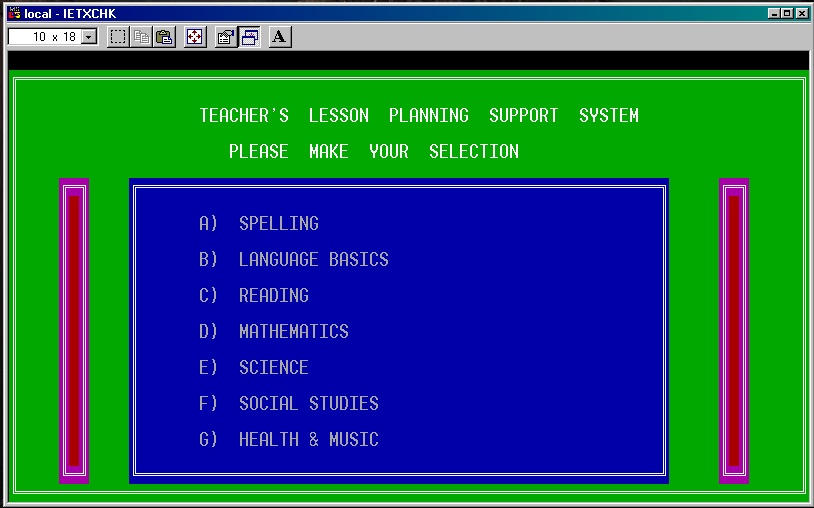
When you access TEACHERS SUPPORT SYSTEM you will be asked to enter a GROUP CODE. This refers to the group code as set up in the grading system. Now if you have split up you class into two or three groups be sure to always enter the group code for the first group since the lesson plans apply to all the groups. If you have not developed your groups yet simply enter A for the GROUP CODE.
Lesson planning is divided into 2 semesters. That is you develop lesson plans for each week of the first semester and then the second semester. When you first use this system you can review what is already set up. You can experiment with the data provided in the lesson plans already entered. Then you can delete all the lesson plans for a given subject in a given semester and begin to develop your own. If you accidentally delete your own lesson plans totally you can restore them in the DELETE function which will be described later.
You can easily replace the lesson plans provided and change the subject menu to your requirements. Now you have two semesters and each has a teaching subject menu.
The arrow points to each of the menu line items. If you wish to change it simply type in your selection keeping the line item letter code. Once you press ENTER the pointer will go to the next line item. If you make a mistake you need to restart the process using the (X) command. Once you have made changes to the menu you can proceed to add lesson plans for a subject. Simply select the associate subject letter code or clink on the line with the proper subject using the mouse. This will bring up the following menu:
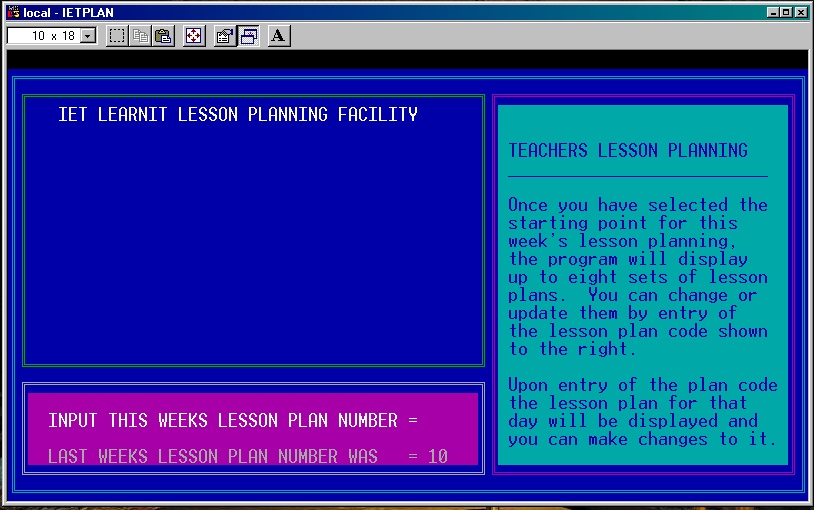
On the bottom window of the application screen you will see LAST WEEKS LESSON PLAN NUMBER WAS 10. This means that lesson plan 10 coded as PLAN10 was the one used for last Monday. If you are setting up a new weekly plan you would increment 10 by 5 giving you 15. Thus the next lesson plan will start with 15 or PLAN15. If you are simply making changes to existing lesson plans in this range you would simply press enter since this would imply that the start point would remain as PLAN10 as shown on the next menu:
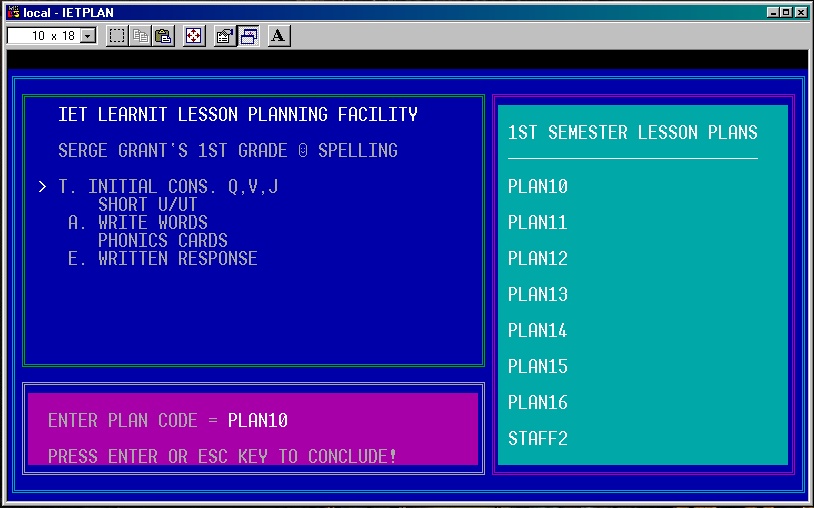
In this case I wanted to review PLAN10 so I entered PLAN10 and it displayed the plan in the left side window of the application screen. You could have entered just 10 and the same would occur. If there was only ten plans developed to date and you wanted to set up PLAN11 all you have to do is enter PLAN11. In this case PLAN11 will be added to the lesson plan list on the right and a blank screen with be displayed on the left side for entry of the lesson plan. You have up to 9 lines of data that can be entered per lesson plan per day. when complete press the ESC key and it will save your new lesson plan.
When you press ESC you can VIEW OR EDIT ANOTHER PLAN. If not then you can change the starting point of lesson plans by answering (y)es to the question POSITION ADJUSTMENT REQUIRED? This will take you to the first screen shown and you can enter a new starting point.
If you respond (N)o to the POSITION ADJUSTMENT REQUIRED? and by the way pressing the ENTER key is equivalent to (N)o, you will get the next menu which provides you with a series of EDITING functions.
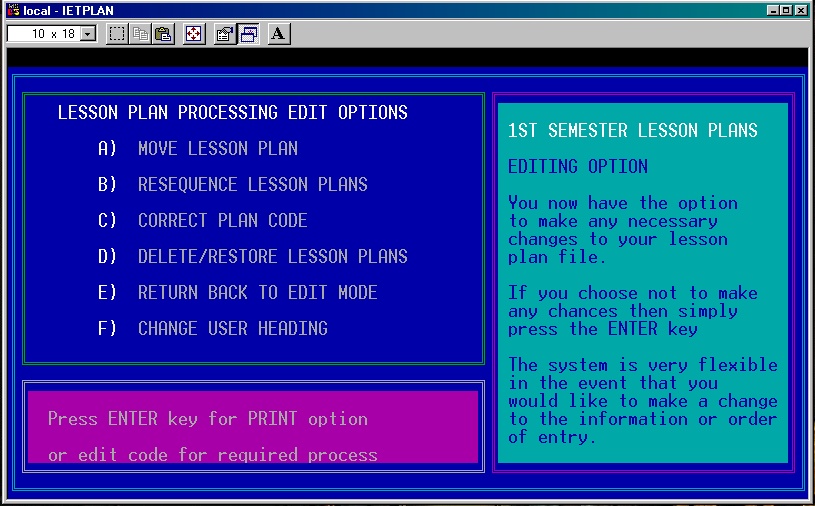
These are a series of editing functions that provide full control of your lesson planning process. The functions are:
- MOVE LESSON PLAN
- RESEQUENCE LESSON PLANS
- CORRECT PLAN CODE
- DELETE/RESTORE LESSON PLANS
- RETURN BACK TO PLAN TEXT MODE
- CHANGE USER HEADING
- SELECT SUBJECTS FOR WEEKLY PLAN
- PRINT LESSON PLANS
- TRANSFER LESSON PLANS
MOVE LESSON PLAN
After you have established a sequence of lesson plans you can move a lesson plan from one point in the list to another positions. You may want to do this after you review your weekly lesson plan report and feel that it would be better if you did it in another sequence. Simply select MOVE LESSON PLAN. The program will ask you for the plan to move, enter it. Next it will ask you to enter the plan that this moved lesson plan is to be placed in front of. Example if you wanted to move PLAN13 in front of PLAN11 then you would enter first PLAN13 then PLAN11. Now your plans are out of sequence but this can be resolved by the next function.
If the lesson plans are out of sequence due to a move of a plan then you can
resequence the lesson plans by selecting RESEQUENCE LESSON PLANS. This will
change the lesson plan numbers and all the lesson plans will be in sequence again.
Note that if there are any vacation, sick leave, or work days entered the sequence
numbers for them will not change. Only the lesson plans that start with PLAN will
change in any re sequencing.
If you make an incorrect entry as to the plan code you can correct it by using
CORRECT PLAN CODE. The program will ask you to enter the word in error and then
to enter the correct plan code word.
With this function you have the choice of deleting a plan or all the plans for a given
subject. The reason for deleting all the plans is provided since the original plans
provided were only examples of a lesson plan for a first grade teacher. You can
delete the total set of plans and start all over again. If you make a mistake and
delete all your lesson plans for a given subject then you can restore them by
following the instructions.
When deleting a lesson plan that you entered from the list you will want to re sequence
the lesson plans using the previously defined function.
If you delete the total set of lesson plans for a given subject, on the next access to the
lesson plans, the program will ask for your name, class that you teach, and subject. With
this it automatically initiates a new lesson plan file for a given subject. At that point
there will not be any entries in the right window. The program will ask you to enter
a plan code. Once you do it will add it to the list on the right and provide you with
a blank area to enter the lesson plan.
This function simply returns you to the mode of entry or inquiry into the lesson plans.
At this point you can reposition the starting point of the lesson plans by entry of
another lesson plan other than the one displayed in the bottom window. This gives you
the flexibility of moving around in your set of lesson plans but more important, it
permits you to position to the lesson plan that will be used for next Monday. Thus the
first five lesson plans shown will be the ones for every day of the week. Once this is
established you can go to the print function and print out your lesson plans for next
week. This will be described later.
If you made a mistake as to the lesson plan heading which includes your name, class,
and subject you can change it. Another possibility to consider. Lets say you want
one of the teachers in a class level to develop the pseudo lesson plans for the total
semester and each teacher then would pay that person a fee to do so. Once they are
complete the individual will use the transfer facility to propagate the lesson plans
to each of the team member computers. This process will be described later. Once you
have it in your computer you will need to change the heading from that person to you.
This is important since the printout will have the heading that you entered.
Before you proceed to work on the weekly plan or if the plans have been pre developed
then selection of the starting lesson plan for Monday, you need to know which subjects
you will be teaching that week. At the same time your substitute also need to know what
subjects will be taught. Your administrator must also know what subjects will be
taught since she or he will not receive a report but the lesson plan files. So it is
imperative for the administrator and substitute as well as the teacher which subjects
to set up a lesson plan for a given week.
Form the TEACHERS PRIMARY SUPPORT MENU you will select LESSON PLANNING SUPPORT and from
the mini menu you will select SUBJECT SELECTION:
RE SEQUENCE LESSON PLANS
CORRECT PLAN CODE
DELETE/RESTORE LESSON PLANS
RETURN BACK TO PLAN TEXT MODE
CHANGE USER HEADING
SELECT SUBJECTS FOR WEEKLY PLAN
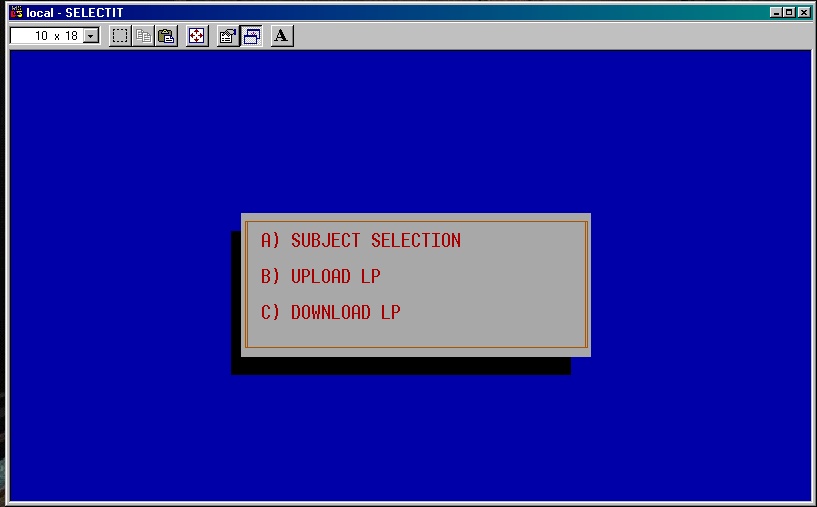
From this mini menu you will access the program which will either show the subjects selected for a weekly lesson plan or permit you to make the selection as follows:
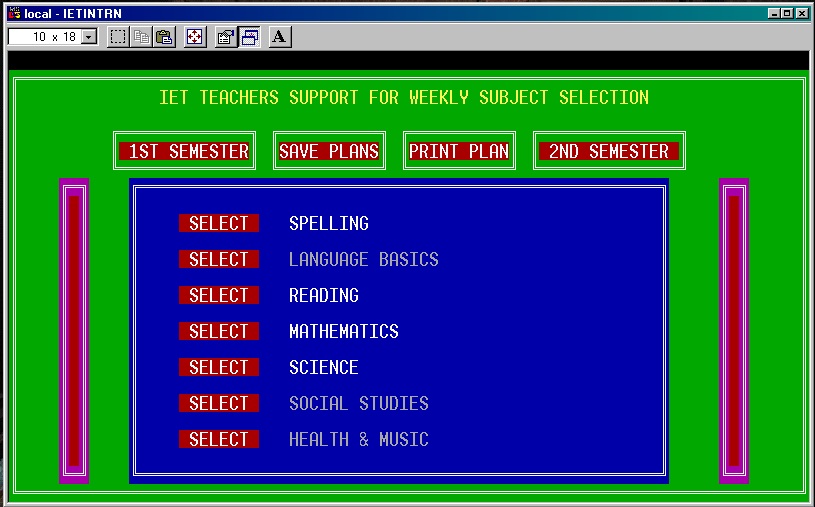
Since you have an option of building lesson plans for two semesters, you need to make a selection as to which semester your lesson plan is for. The administrator and the substitute will also know which semester you are teaching in at that time. To select the semester you simply click with the mouse on the appropriate box. This will display the current subject selection. This will inform an administrator or a substitute as to which subjects to print if required. To exit this menu position the mouse in the upper area near the header and click the mouse.
If you are getting ready for the next week and need to change the subjects that you will teach. You simply click on the SELECT associated with a subject. This is a toggle switch. Click it once and the subject is selected. Click is once more and the subject is . If the subject is highlighted then it is selected. To save you selection for yourself, administrator, or substitute, simply click on SAVE ENTRY.
If you wish to get a printout of the subjects to be taught each day, you can click on PRINT PLAN. There must be at least three subjects planned and selected to be taught for the print facility to work. Furthermore you can not have more than 5 subjects per week. In other words to few or to many is not a good teaching environment.
This print facility is primarily for administrators who wish to review teachers planning techniques and for substitutes that can get a printout of all the lesson plans prepared for the week that they will be involved in the teaching process.
As the menu says press ENTER for the PRINT option. If you press ENTER you will get the
message DO YOU WISH TO PRINT A LESSON PLAN? If you respond (Y)es then the program will
ask you if you wish to print a Weekly or Total lesson plan. A total report will print
all the lesson plans that you have entered for a given subject. A weekly report will
print the lesson plans for each day of the week.
Now there are weeks that you will have vacation days off or work days when there is
not a school day for the students. You need to make temporary entries into your lesson
plan to show that on a particular day in the week that it is a vacation day or work day.
You will not make an entry for a sick day since you still need to make the lesson play
for that day so that the substitute teacher knows what to do. In this case you will also
need to transfer the lesson plans to that teacher. This will be discussed next.
To discuss this process we will take an example. Lets say that on Thursday and Friday
you have both days off. Lets also say that the lesson plan that you will be using on
Monday is PLAN10. Normally PLAN10, 11, 12, 13, 14 would be used for the week.
In this case Thursday and Friday are holidays. Thus you will go into the EDIT mode
and enter VACA13 and VACA14 and when asked to enter description you would simply
enter lets say Thanksgiving Holidays. Now you need to use the move function to move
each one of these entries to the right position or in this case in front of PLAN13.
When done you should have as the first SEVEN lesson plans shown in the right windows as:
If the school day off is a word day for the teachers then use WORK13 rather than VACA13.
One other time that needs to be discussed. The program sends the printout to the
printer selected in the C~GATES control facility. For administrations to print
a condensed lesson plan you need to select (X) for the primary printer which will
route the printout to the default printer on your computer be in a USB or parallel
printer connection. If your printer is a USB connection you must use the (X) printer
option rather than LPT1 OR LPT2 which are parallel connections. When entered you
will see LPTX as the printer port which simply means the default printer be it on
a USB or parallel connection. USB stands for universal serial bus connector. For more
information on how to set the printer option select C~GATES SYSTEM
and then select NETWORK CONTROL FACILITY and then PRINTER PORT CONTROL.
The transfer facility is discussed here since the first action to transfer is initiated
in the print functions. When you print a lesson plan your total lesson plans, controls,
and menu are moved to a staging area. This occurs for each subject that you print a
lesson plan for a given week. This is transparent to you. But there is a need to transfer
lesson plans. They are:
PRINT LESSON PLANS
Now when you print the lesson plan it will have lesson plans for Monday, Tuesday, Wednesday,
and vacations days on Thursday, and Friday. Now you may want to delete these vacation entries
from your list but be sure not to do so until the following week when you are ready to
prepare the next weeks lesson plans. The reason for this will become evident as we describe
the TRANSFER function.
TRANSFER LESSON PLANS
For this process you will select TEACHERS PRIMARY SUPPORT CONTROL MENU and then
select PLANNING & MANAGEMENT option. With this selection you will receive this mini menu:

If you are up loading the lesson plans you will select UPLOAD LP. When you do this you will be asked to enter the month and the week of the month that he lessons are for. Again to describe this we will use an example. Lets say your initials are PAG. These are the initials that you entered into the C~GATES control request when the application management software was initiated. The program will now zip all the files into one file. If you entered for month 05 for May and 2 for the second week, the file name will be: PAG05206.ZIP. The 06 is the year of the lesson plan entry. This file will be transferred to the UPLOAD Directory.
Now you need to get on the internet and select your EMAIL service and transfer the file PAG05206.ZIP as an attachment to the school administration, a team member, or substitute teacher's computer. If the substitute teacher does not have a computer, it can be transferred to your computer in your classroom. The substitute teacher will then use the system to Download your lesson plans and print them before the class starts.
The download process for the administration, substitute teacher, or team member is the following. First that person will check his or her EMAIL. Select the EMAIL that has the lesson plans attached and then request download of the attachment to the DOWNLOAD directory on their computer. When the ECM software gets installed it will automatically set up a DOWNLOAD and UPLOAD directory.
Not to repeat the obvious but the receiving party must also have the IET system installed in his or her computer as well as in the school computer. From the TEACHERS PRIMARY SUPPORT CONTROL MENU you will select LESSON PLANNING SUPPORT option. This time you will select DOWNLOAD LP. You will not have to enter any information concerning the download file. The program will unzip the file and transfer the lesson plan files to the IET database. Another option is to not zip the file in the first place and simply keep it as a .txt file. The file is relativly small incomparison on a single picture sent on the internet.
Now the substitute teacher, team member, or administrator is in the same mode as the teacher that developed the lesson plans. He or she can now print the lesson plans. When a subject is selected, the list of lesson plans will be positioned in such a way that the Monday lesson plan will be the first one displayed so that he or she can print the weekly report for each subject required to be taught for the given week.
The teacher could send the lesson plans to herself at school in the same manner and print the lesson plans there.
Now if a school administrator wishes to review the lesson plans provided from one of the teachers as requested on a regular basis, he or she can download from the EMAIL using the procedure defined. Each download from different teachers at different grade levels will not only change the lesson plans but also change the TEACHER'S PRIMARY SUPPORT CONTROL MENU line items since different grade levels teach different subjects.
This system provides you with the capability of recording grades for your students.
There are different ways to record grades:
You can also make an entry of a raw score in edit mode. Position the same way
as described for percentage entry and then press the (=) key. The program will
come up with a mini menu and ask you for the total number of problems and then
the number correct. It will then convert it into a percentage decimal entry in the
log.
You can also select CLEAR/ADD STUDENT GRADES option from the edit menu. A mini menu
will appear and ask you for the total number of problems in the test. Then it will list
all the students in a group one at a time and ask you to enter the number of correct
answers. Once done it will add these scores to each of the students in the proper
column and row.
Once the grades are entered, you can select to print a grade report for a group of
students which shows all the tests and percentages for a given subject or you can
request a printout of all the average scores for a specific student in all the subjects
studied for a given grade period.
To fully describe this procedure we will use application screens and windows from the
grade keeping system. First of all when you select GRADE KEEPING PER CLASS from the
Teacher's Primary Support Control Menu you will get the following menu.
GRADE KEEPING PER CLASS
In edit mode you can enter and correct grades by positioning to the grade entry
position using the arrow keys and then simply entering the percentage such as
100, 90, 75. The program will convert it to a decimal percentage.
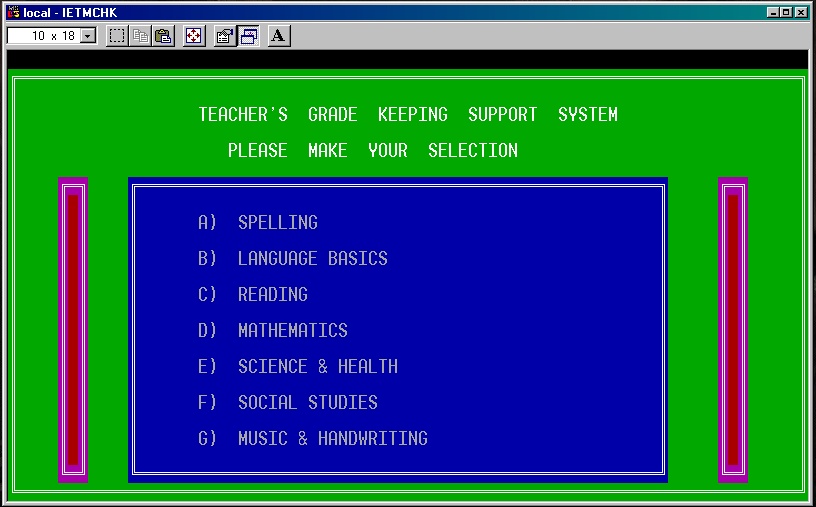
While this menu is preset for a first grade teacher, you can easily change it to meet your requirements. Usually when a menu screen of this type is displayed you would select one of the letter to enter from the line item on the display. To change the menu line items you simply enter (X). This will display the following screen:
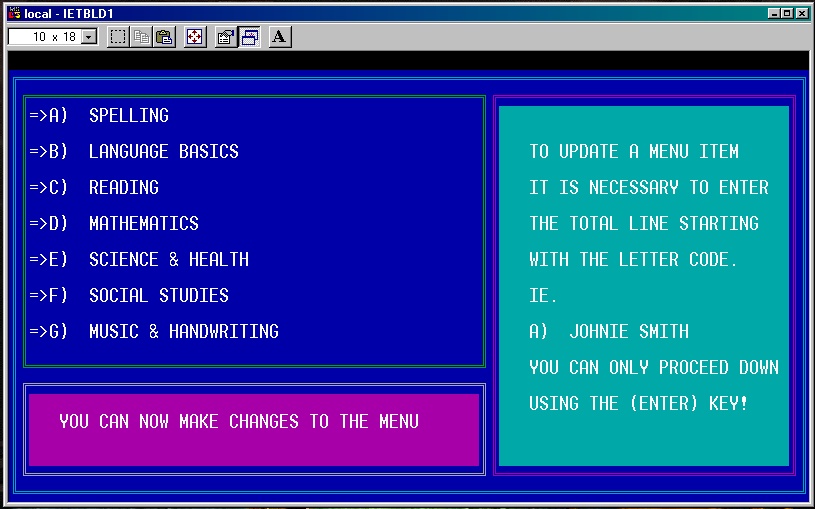
The arrow will first position to the first subject. You can type in your own subject but be sure to precede it with its corresponding letter code. Lets say you wanted to change the first entry to Arithmetic so you would enter A) ARITHMETIC. Once you were finished and press the ENTER key the arrow will go to the next entry. If you do not want to change a particular line item simply press the ENTER key at the start of the line.
If you only have five subjects and you made entries for A,B,C,D and E, you still need to enter F) and G) but leave the rest of the line blank. If you are only teaching one subject then what you should consider is breaking down that subject into categories for which you will be grading. Lets say you are teaching the subject of SPANISH. The seven categories of study could be:
- A) ALPHABET & PHONETICS
- B) GRAMMAR
- C( WORD GROUPS
- D) PHRASE GROUPS
- E) DIALOGUE READING
- F) WRITING
- G) CONVERSATION
> If you selected SPELLING which is the first subject in the initial menu provided you will access a list of students after you enter a group code. The group code can be A,B,C,D ETC. The reason for the group code is two fold. The menu supports only 16 entries without paging back and forth. It is also easier to work with a select small group when grading papers. In the next window selected we have chosen GROUP A. When you do this you will see in the right window the students that you selected for that group. In this case for an example there are only three students. Now you are asked to ENTER STUDENT NAME.
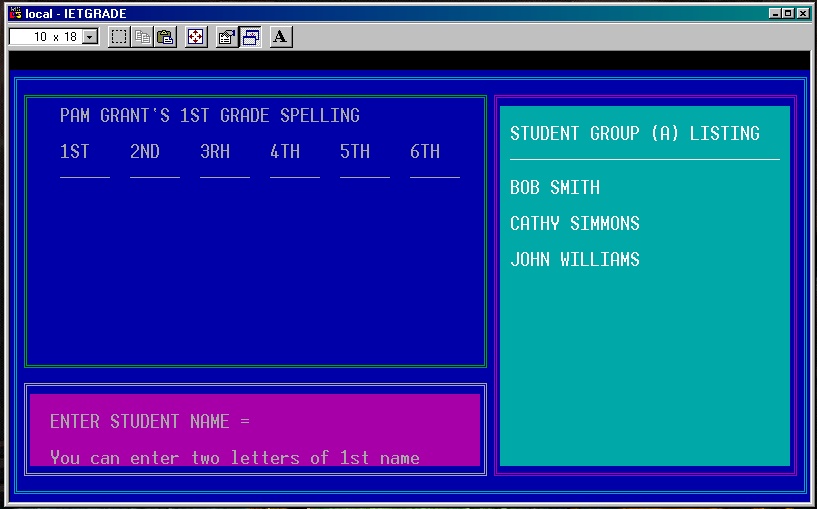
When you enter the student's name and by the way all you have to do is enter enough letters of the students name that makes it unique relative to the other names in the list. So if you want to access BOB's grades you simply can enter BO. Note that you must enter at least 2 letters. Now if you want to add a new student to the list you simply enter his name at this time. When you do so and you still do not have a test score for him or her, you need to enter a dummy score such as 100 otherwise the system will not see any grades for the student and assume you want that student deleted from the list. When you get the first actual test score you will replace the 100 percent with the score received.
When you enter the student's name, his or her test scores will be displayed as shown in the example below:
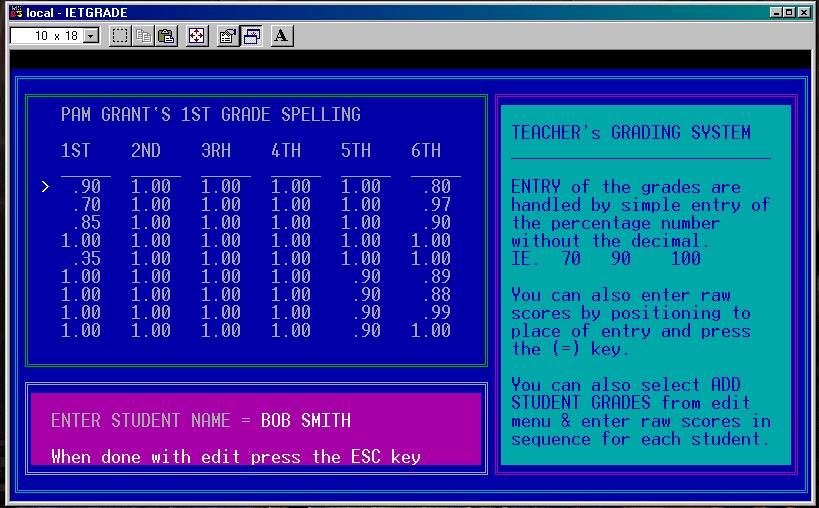
As you can see from the application screen, there are six periods and each period can have up to 9 scores. You do not have to use all six periods nor do you have to enter nine scores per period but both are limits. If you exceed these limits we feel that you are testing to much and not teaching enough. Furthermore that is to much work!
In the display shown where the arrow is pointed, lets say that you wanted to change the .90 score to .85, you would simply enter the exact percentage of 85. The program will convert it to the percentage since percentages are decimal equivalent. 100 percent is 1.00 which has a fraction equivalent of 15/15 = 1.
Lets say you did not have a calculator and did not want to calculate the percentage but you knew it was not 90 percent. Rather then enter a percentage you simply press the (=) key and a mini window will pop up and ask you to enter raw scores from which it will calculate the percentage and replace the .90 previously entered.
There is a third way but that will be discussed in this next section. When you have reviewed the grades for a student and made any changes you can exit a students grade log by pressing the ESC key. At this point the program will ask you to enter another student's name. If you do not need to enter another student's name then you simply press the ENTER key when prompted for a new name. This will take you to the edit menu shown below:
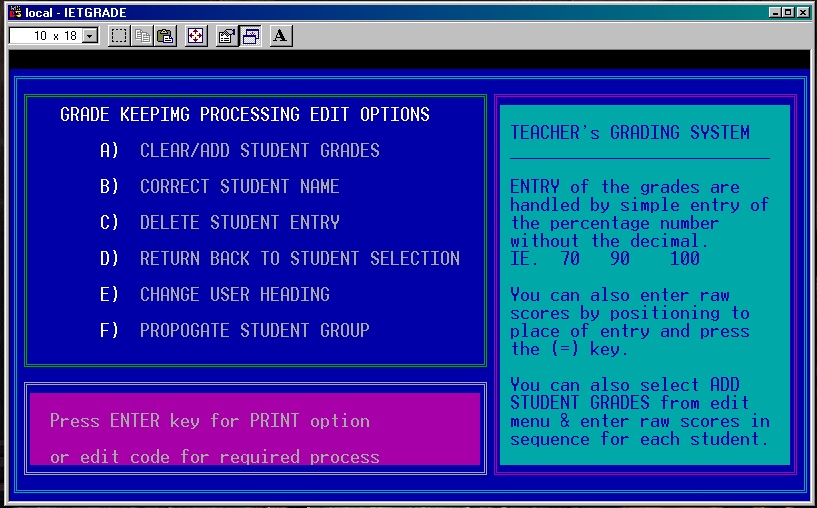
There are six options:
- CLEAR/ADD STUDENT GRADES
- CORRECT STUDENT NAME
- DELETE STUDENT ENTRY
- RETURN BACK TO STUDENT SELECTION
- CHANGE USER HEADING
- PROPAGATE STUDENT GROUP
This option gives you the capability of deleting all grades for a select group
of students based on the group code that you entered. You will see the list of students
in the right window. When you select this option you will get a mini window that
gives you two options:
If you choose (Y) all the grades are removed for every student of the selected group.
When you restart the program you will have a blank listing to which you can add new
students. Note that you need to do this for each group that you have established and
furthermore you need to do this procedure for each subject that you teach.
Now in the case of a semester clearing, you can do it for the first subject and then
utilize the propagate feature to copy the change to all the subjects that you teach.
Propagation will be discussed later in this reading.
To add new grades for a group of students you need to select ADDING NEW GRADES. To
prepare for this mode you simply need to record on each page the number of correct
responses and sort the pages into groups as you have in the computer system. The
function will ask you for the total number of entries in the test and the period
in which this test was given. Then in sequence it will give you a students name
and ask you how many correct responses he or she had. When done it will convert
the raw scores to percentages in decimal format and store it in the first available
space for the designated period. If you already have 9 scores it will reject your
request.
You could use the DELETE option and then reenter the name in error or you could
use the CORRECT STUDENT NAME option. The program will ask you to enter the name
in error. Then it will ask you to enter the correct name. The name will be
corrected and redisplayed in the right side window.
The program will ask you to enter the name of the student that you wish deleted.
If it finds it, it will ask you if you are sure you want to delete it. If you
respond (Y)es then the name will be deleted. Now if you have already entered
grades for each subject, you can not use the propagate feature since the grades
would be wiped out. You simply need to use this option in each subject that the
student was being taught. It does not hurt to simply leave that person in the list
and delete him or her at the change of semester.
If you want to access information about another student you can do so by selecting
this option. This will take you back to where the program will ask you for a student's
name.
When the system comes to you it will have a sample teacher's name. You can change this
heading by option (E) CHANGE USER HEADING. This function will ask you for
your name, your class and the subject that has been selected. Once you enter these three
items the heading will be changed. You will want to do this with every subject that you
teach or let the propagate feature do it for you. That will be discussed next.
The propagate feature was set up to support entry of a new set of students. First of all
to utilize this feature you must select the first subject listed. The system will ask
if you wish to:
If you accidental ran a propagate after you have entered scores then those scores will be
replaced with the scores in the first subject. To restore the system to the state before
the mistake simply select RESTORE STUDENTS.
Note that you need to restart the program for each group of students and rerun the
propagate feature.
This facility is provided to support the logging process for:
The entries on the menu listed above can be changed if necessary by
selecting (X) instead of the line item code. If you do so you will need
to change the descriptive header that is utilized.
The Time Management & scheduling utilizes the paragraphic method. To get details
of how to use the paragraphic method you could access the EASYCOM documentation
or utilize the facility and select the F1 key. This will give you a list of
function keys and the respective documentation in support of the paragraphic method.
The process is similar to grade processing except you have a free form entry in the
left window for entry of information.
You can enter up to 16 paragraph words to support any management needs that you may have.
The system has one entry and this WEEKLY SCHEDULES.
Both in free form and paragraphic mode when you are done with review or entry you simply
press the ESC key to exit. This will save whatever you had entered. In paragraphic mode
when it asks for ENTER WORD/CODE = you must enter a valid or new entry. You can not
press the ESC key at this time. If you make your new entries with a letter code
then you can access that line item with simple entry of that letter code. When you
press ESC you will get a message END ACCESS OF CATEGORIES. To exit you need to respond
with (Y)es. At that time as was the case with grade processing, you get a mini display
of editing options. You can:
The IET system provides two types of quiz processes:
The quiz is simple to edit and build since you simply enter data using a word
processing facility. The document that you build for the quiz has instructions
and a sample at the beginning of the document. Each test item is separated from
another by a dash line.
When you have your students run a quiz it can also record their score in the
grade log as long as you set the controls to do so. You can also specify that the drill
is a quiz and not a test. This way the system will not record a grade although it will
+ log the students activity and the score attained per subject, level, and group.
If you change the test and wish to restart both the champion and activity log files
you can do so. Now there is only one file for each subject. You do not have access to
the name of file. To create a new quiz for lets say the second period of testing,
you will be able to propagate the current test to the new level and then edit the
test or simply start a new test file. If you start a new one then you will have
a file with a full description of what you a need to do with one sample test
problem on it.
There are two ways to access the quiz support facility. One is from the teachers
perspective and the other is from the student's perspective. We will fully illustrate
the teachers perspective and then discuss the students perspective.
From the Teachers Support Menu, you will select G) QUIZ PROCESS AND SETUP. This will
display the following menu:
CLEAR/ADD STUDENTS GRADES
When you select (C) you will get another mini window that gives you two more options:
If you choose (S) for a semester change that the program will clear all the grades
and than add one 100 percent grade for each student. Now you are ready to enter new
grades for the students when the new semester starts. Start them with one 100% for the
simple fact that they took the effort to come to class.
CORRECT STUDENT NAME
DELETE STUDENT NAME
RETURN BACK TO STUDENT SELECTION
CHANGE USER HEADING
PROPAGATE STUDENT GROUP
If you choose propagate that means that for a select group you have entered all your students
and have set up at least one grade of 100 percent. So that you do not need to repeat this
process for each of the other subjects you can select propagate students. This means that the
student list along with that single grade will be propagated to all the other subjects listed.
You will not have to reenter the names for each subject. Furthermore the heading is properly
changed for each subject.
INVENTORY & MANAGEMENT LOG
While the first entry utilizes the paragraphic mode of entry, the others
are in free from mode. The free form logging process is supported by a
tabbing capability provided that the headings of fields are not changed.
You can change the heading but not the positioning of the field. If you
are familiar with EASYCOM you can change the positioning of the tabbing
as well.
Since we discussed the EDIT features for grade keeping in the last section we will just
simply state that the processes are similar to the grade keeping edit facility.
QUIZ PROCESS & SETUP
Both are designed to motivate and simple to build the quiz. The motivational aspect of
the quiz is based on the fact that if you get the highest score you are the champ until
the next champ comes along. Once you get the highest score the quiz is over and your
name is recorded as the champ. Furthermore, anyone attempting to get a higher score is
also recorded in a log of activity for a given subject.
TEACHERS PERSPECTIVE
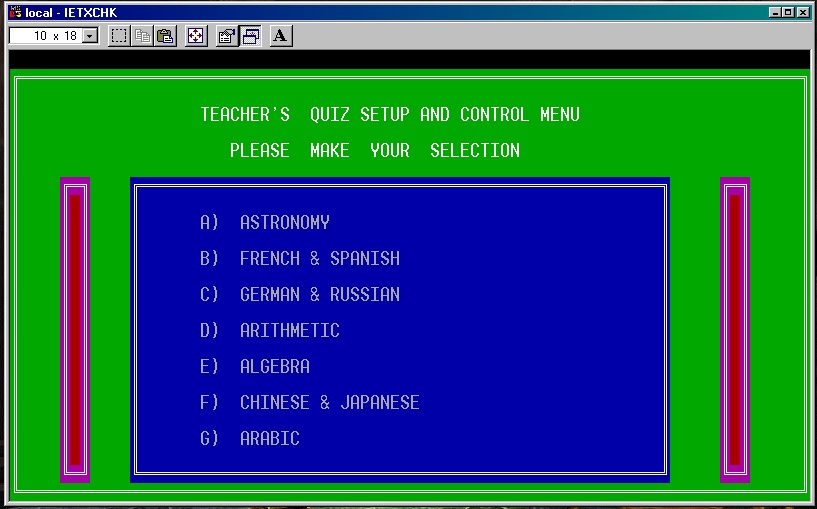
or in a tutoring mode, you may have another student with a different set of subjects that you are working with such as:
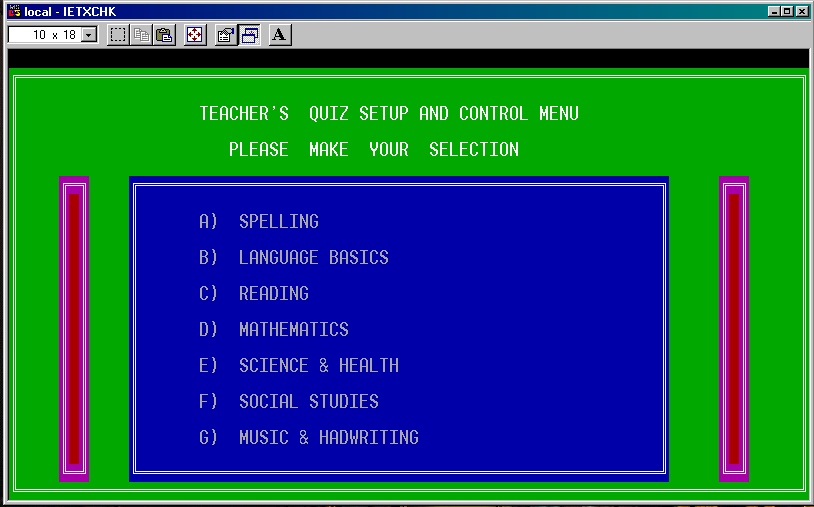
How the menu changes from one to the other will be discussed later. In either case when you select one of the subjects you will get this next menu.
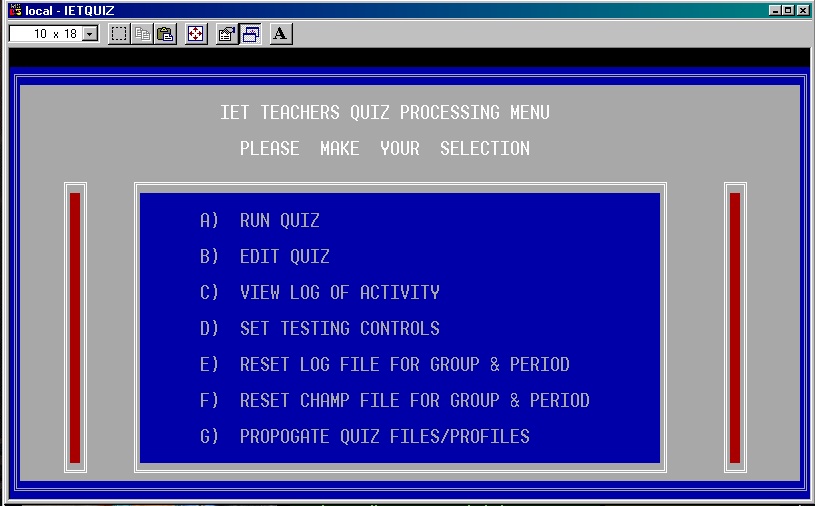
Each subject has these options. they are:
- RUN QUIZ
- EDIT QUIZ
- VIEW LOG OF ACTIVITY
- SET TESTING CONTROLS
- RESET LOG FILE FOR GROUP & PERIOD
- RESET CHAMP FILE FOR GROUP & PERIOD
- PROPAGATE TEST & PROFILE
From the students perspective, whenever a student selects a subject that is associated with his or her educational efforts, the program will automatically run the quiz and this menu will not appear. Rather the program will go directly to the quiz.
There are two type of quizzes that can be set up. The two types are:
When you select multiple choice the quiz word processing file will have one example of a
quiz problem in the required format and an initial description of the process. The
following screen shows the initial quiz element for the subject of ARITHMETIC:
RUN QUIZ & EDIT QUIZ
The multiple choice quiz requires the teacher to utilize the EDIT facility to build the
quiz. If you have not created the quiz yet, the program will ask you if you wish to
build a multiple choice or letter selection quiz. If you choose a multiple choice quiz
it will set up the word processing file for the subject that you selected as well as the
group and period that you selected. The selection process will be discussed in the following section in SET TESTING CONTROLS.
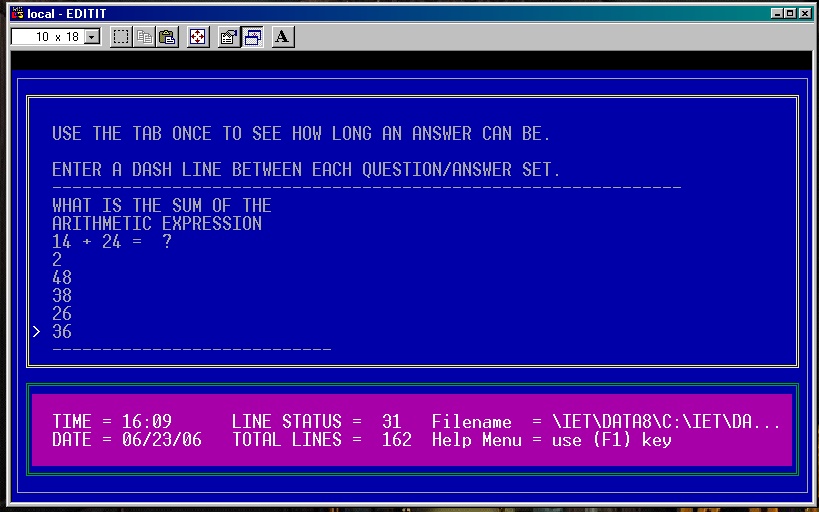
The first three lines represent the question and is displayed in a middle window in the quiz. You can find out how long any of the lines can be by simply pressing the tap key twice. Pressing it once tells you how long the answer can be. The next line is the answer relative number. This is followed by 4 options each is displayed in separate windows on the screen. After the four options you must place a dash line. This tells the computer that it is the end of one question and you can now add another question in the same format. If you make a mistake in the proper format for multiple choice, the quiz will not run and the student will get a message that the quiz in not set up properly.
For a selective letter word quiz you have actually two options. You can have a quiz question which requires the student to figure out what the word should be that is missing the question. These are the words that are being studied for a given grade period. An example of such a test edit file follows:
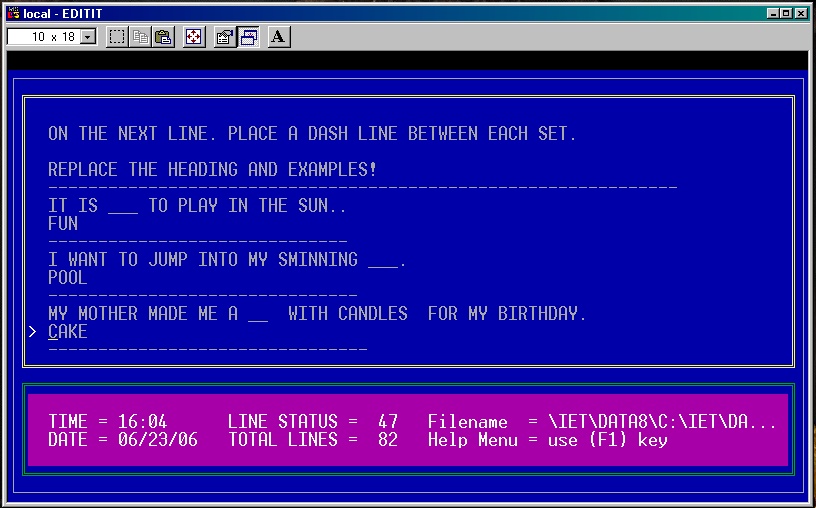
In this type of quiz setup the teacher enters a sentence with the missing word first, then enters the missing word on the next line. After the sentence and the answer a dash line is entered on the next line and then you can enter another quiz problem.
The other option is to enter a definition on the first line, the word that represents that definition next followed by a dash line as is shown in the next display:
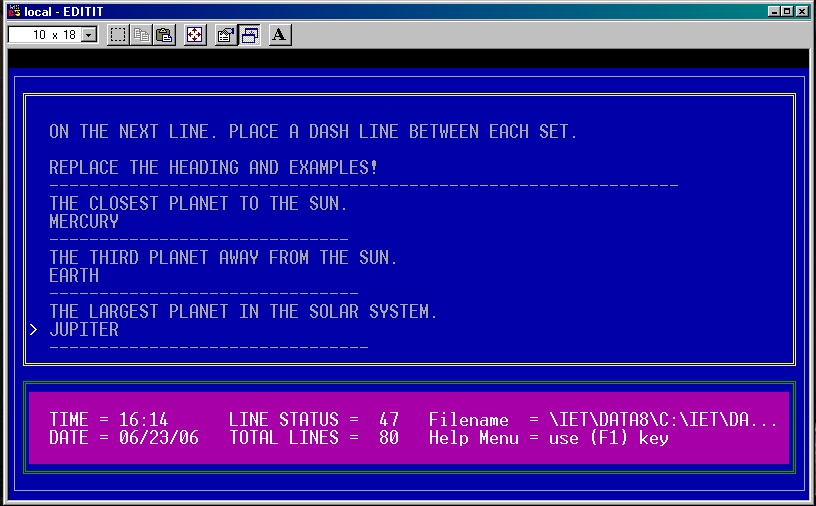
How the student sees this quiz will be discussed in the STUDENT'S PERSPECTIVE section.
The quiz support system is interfaced to the grading system since you have the
capability of telling the system that you want the scores from the quiz to
be logged in the grading system. The grading system is set up on a subject
as well as student groups and grading periods and semester.
Therefore when you ask a student to do a quiz on the system, it has to know
which subject, group, period and semester that the quiz is associated with. The subject
is selected by the student but the group and period must be established by the
teacher. This is why we discuss SET TESTING CONTROLS AND PROPAGATE ELEMENTS at the
same time.
When you select SET TESTING CONTROLS the system will ask you for the group code
and grading period number and semester number. There are six grading periods as established in the grading system as well as two semesters. Now you will be setting up quizzes for each of the periods. The nice thing
about this approach is that you will be able to use these quizzes each year and
it does not take that much time to set each of the quizzes up.
In addition to establishing the period and group code, the system will ask you
if you want to record the percentage score of the quiz into the grading database
for each student using the system. If you respond yes, the system will log all
activity to the grading system for a particular group. You may want the students
to practice first on the quiz before activating the saving of test scores.
Note that the system will continue to save scores for each student in the
group until you deactivate the feature.
The primary control mentioned is the subjects studied by a student or group of students
that you are responsible for. While a menu is provided it is set up for a first grade
teacher. You can change the menu by simply pressing (X) instead of a subject code
from the menu. This provides you with the following display:
SET TESTING CONTROLS & PROPAGATE ELEMENTS
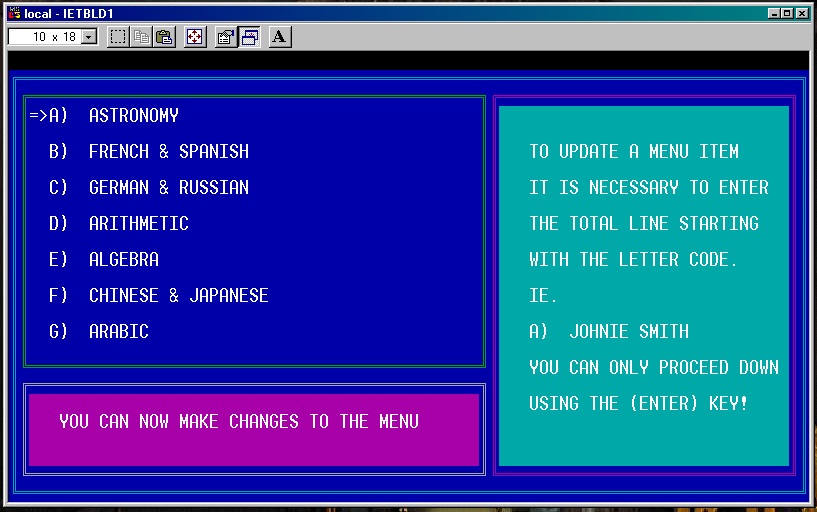
The menu items are displayed and a pointer positions to the first line item. If you want to change it to another subject or category within a subject, you can do so. If you want to leave it as is then simply press the ENTER key. Be sure when entering to clear the line if your entry is shorter than what was there in the first place. Once you enter the 7th subject or category the system will update your selected subjects menu. If you have less than the 7 subjects then simply enter the subject code only. That is enter for example F) & G) if you only need 5 subjects or categories.
It is important to not only change the menu for the quiz but also for the grading system as well as the lesson plans for both the first and second semesters.
This concludes the setup process of the subject list, student group, and period entry. Now you need to save it for a specific group of students be it only one or more. You have established the group in the grading system. You have to propagate the controls and the menus for each student in a group or groups.
Selecting the PROPAGATE option you will be asked if this propagation if for QUIZ CONTROLS or QUIZ file. You will select QUIZ CONTROLS. This system will then ask you to specify the group code. Once you do this the system will save the profile of the IET system to each of the students in the group as specified by you in the grading system. Each time the profile is saved you will get a message that the profile was saved for each student. Press ENTER after seeing the message. Note that each student in the group must also be entered in the IET user list properly.
If you ever make a correction, you have to be careful! You must preload the profile of one of the students from the group first. This is simply done by selection of the STUDENT LEARNIT
SYSTEM from the primary menu and enter one of the students initials and telephone number.
When the system asks if you want to study or run a Quiz simply press ENTER. Then press
ESC to return to the IET primary menu. Now you will select the TEACHERS SUPPORT SYSTEM.
In the process of doing this the system will load that individuals profile of the IET SYSTEM.
Now make the necessary changes and then use the QUIZ system to propagate the update
to the respective group.
Again I want to remind you
that the lesson plans, grading, and quiz menu's must be the same. That is the subjects
listed must be the same. Furthermore be sure that you have selected the correct student
group code that these subjects relate to.
Now in the case of a teacher in a classroom the complexity goes away since he or she
is teaching the same subjects to a set of student groups. On the other hand if you are
a home teacher or tutor, then you may be teaching different subjects to different set of
students and so the system must support this option as well.
The second option for propagation is the ability to transfer a quiz from the first group
to another group. Furthermore if you make changes to a quiz you do so only for the first
group and then propagate it to the other groups that you have established that will be
using the same quiz. On the other hand if the quiz is to
be different for each group for a given period you will have to make changes to each
quiz separately. In other words once you propagate the initial quiz you can add to a quiz
file for a given group. To access the proper quiz you must first set the TESTING CONTROLS
to the proper GROUP and PERIOD.
In this case you do not need to preload a profile as described above. You simply go to the
TEACHERS SUPPORT from the primary menu then select PROPAGATE QUIZ FILES/PROFILES and
then select (Q)uiz files. Then you will be asked for the receiving GROUP CODE and the
GRADING PERIOD.
Now you have to be careful here! Whatever the current testing controls are set to is
the selection of the quiz that will be transferred.
So check the controls first before propagating a quiz file.
When you request to view log of activity, you first must set the controls
to the group and period. Since you have selected the specific subject to
get to this option, you only need to remember which group this subject is
associated with. This is only the case for home schooling where a tutor
could be teaching different students at different grade levels.
For a class teacher the menu of subjects taught will be the same. In either
case the log of activity is sensitive to the subject, period, and group.
The log does provide all the activity of every student working on that computer.
It does not compute grade scores. The computing of grade scores from a quiz
is supported by the SET TESTING CONTROLS. The program asks if you wish to
activate the grade keeping facility. This gives the teacher or tutor the
flexibility of permitting the student to learn first then take a test. The
test is always given in a random method so the student will never see the test
in the same sequence.
Whenever a student does a quiz and exceeds the score of a previous champ, his or her
name is stored in the CHAMP file. The next student taking the same test will see that
persons name but not his or her score. This is the built in incentive. The champ name
and score is saved. If you redo or add to a test you may want to reset the champ file.
This will reset the score to 50. Now a student will do a quiz until he or she exceeds
the champ score or exceeds the number of quiz programs. Due to the random nature of the
quiz process, the same question could be asked more than once.
The same is true for the LOG FILE. You can reset the log file if you decide to make
a change to the quiz. This will simply clear the log file and permit entry of a fresh
set of student activity.
When starting a new school year you will want to reset all your log and champ files for
each period, group, and subject. While this may take some time, it is easy to do.
Now the control are preset by the tutor or teacher and saved in the profile for a group
or students prior to the student running the test. This was all discussed in the teachers
perspective.
When a student wishes to or is required to run a quiz he or she will select STUDENT'S LEARNIT SYSTEM from the primary IET menu. The student will then enter his initials and last 4 numbers of his telephone number. The system will then load the student's profile. Then the student
will enter the letter (Q) to the following question:
VIEW LOG OF ACTIVITY
RESET LOG FILE & CHAMP FILE
STUDENT'S PERSPECTIVE
The students perspective is quite different from the teachers perspective. The student
does not see the teachers control menu for the subject that he or she will select. Rather
the program goes directly to the quiz.
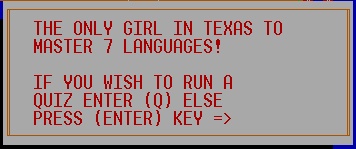
Note the message "THE ONLY GIRL IN TEXAS TO MASTER 7 LANGUAGES. You as a teacher can customize a special message for each student if you choose to do so as described previously. When the student responds with the entry of (Q) the profiled quiz menu will appear:

Lets say that the student wishes to run a quiz in ASTRONOMY thus the student would click on the Astronomy Line or simply enter the letter A. Now the astronomy quiz was developed by you the teacher as a BUILD WORD method. The first thing that the student will see is a screen showing the current champion:
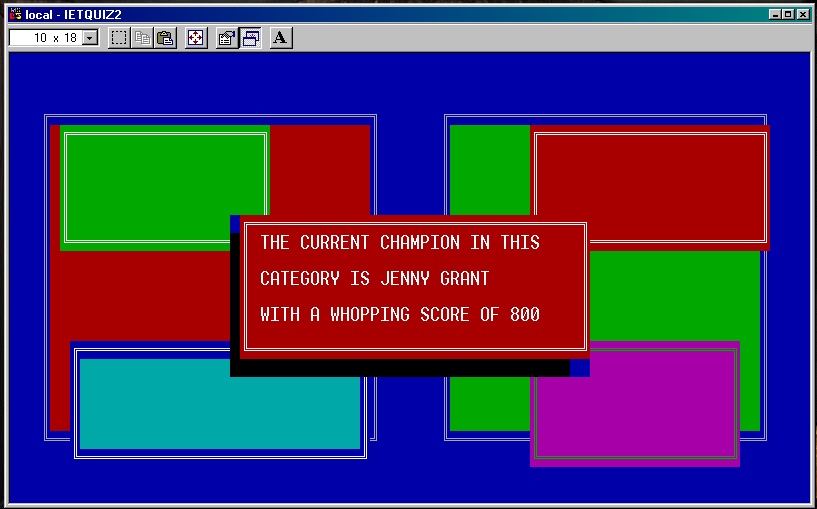
Now if the test mode is set ON then the student can only make one error in letter selection so the screen says TEST MODE ACTIVE NUMBER OF MISSES IS SET TO 1. If the test mode is not set, the student can choose to set the number of misses from 1 to 10. The lower the number the higher the points that the student gets for the correct answer. The following screen shows the case of test mode ON:
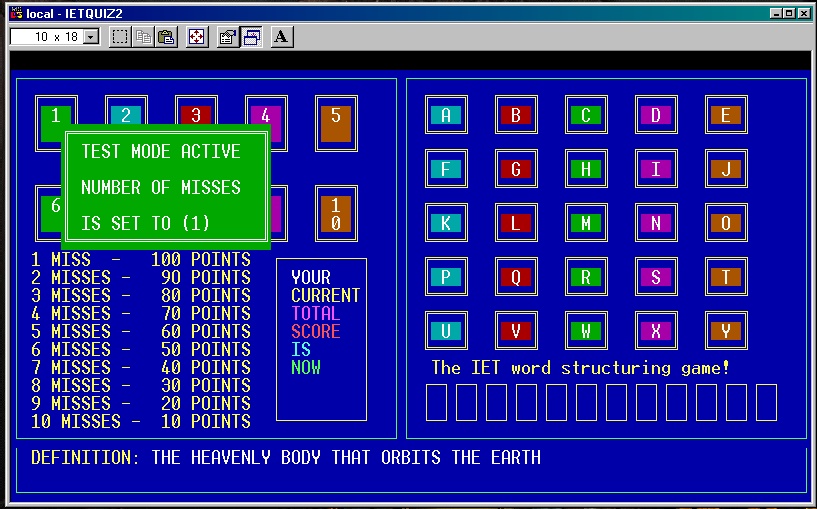
Well the answer for the question shown is MOON. The student will have to select the proper letters by using the mouse. If he or she selects the proper letters without exceeding the selected error count, the student will get a positive response and a positive score otherwise it will be considered an error. There are ten positive responses so the student will not hear the same response more than twice usually.
As the student selects the letters of the correct response, they will be placed in the proper position in the answer section of the quiz screen as shown: note that only MOO is entered. Once the N is entered he or she will get a positive response and the program will display the next question:
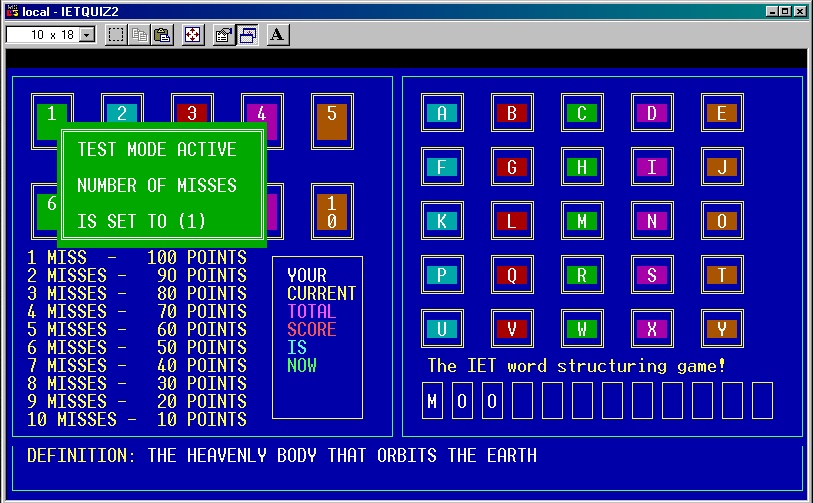
Once the word is complete, the positive response will be voiced and the next problem will be displayed. If the student becomes the new champ which means that he or she now has the highest score, the quiz is over and he or she now is the champ for this quiz as shown:
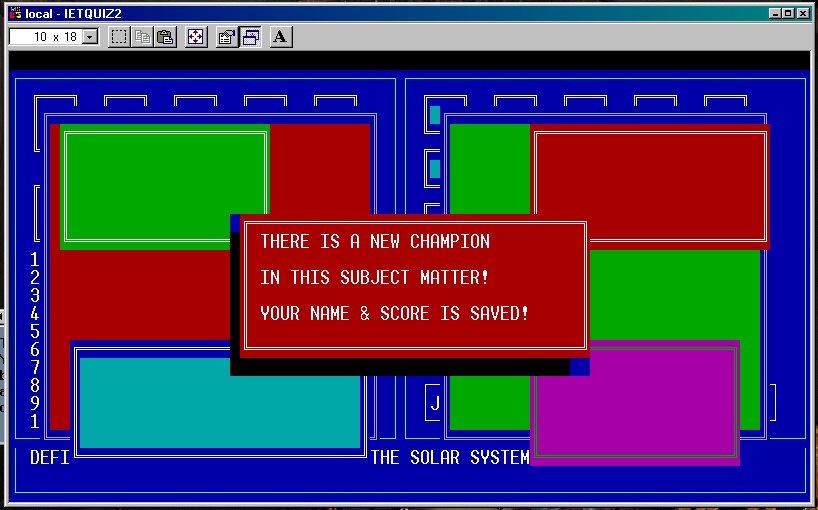
Now the other format for a quiz can be shown if the student selected Arithmetic. This type of quiz always will have four options as set up by the teacher in the previous description. Again as in the previous quiz, the current champ will be displayed first. Then the program will go directly to the quiz:
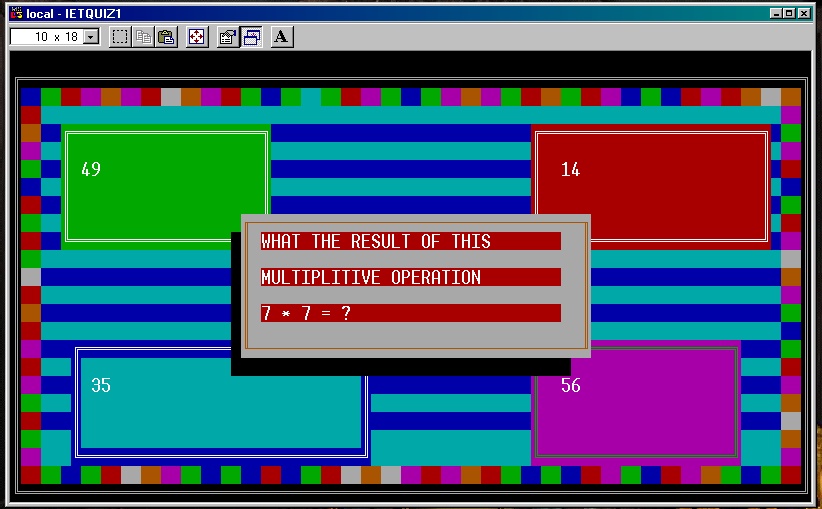
All the student has to do is click on the correct answer. If the answer is correct he or she will get a positive response otherwise a negative response. As the student proceeds thru the quiz, his or her score will be shown:
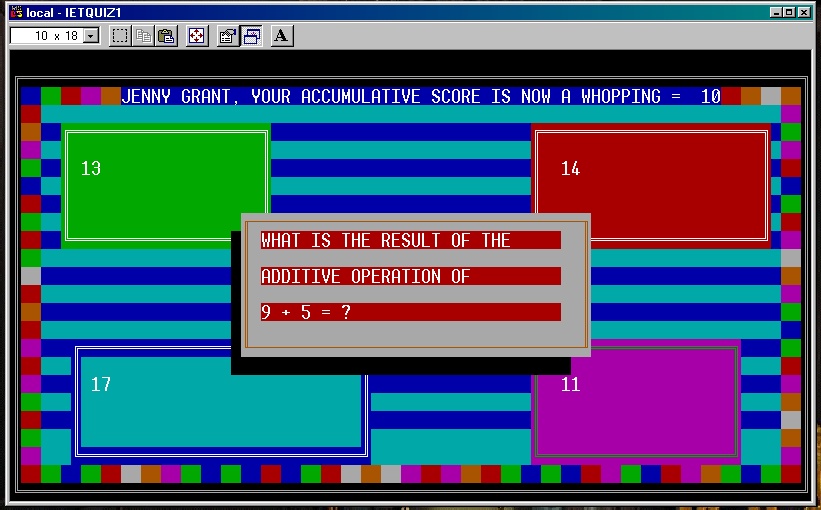
When the student reaches a score higher than the previous, he or she becomes the champ and the quiz is over. In both types of quizzes, the student can challenge his or her score and try to do better each time. This becomes a fun way to learn. Furthermore the teacher can activate the test mode where the score is added to the student grade log. Now in both of the above quizzes displays, the test mode was inactive since no mention to the fact that it was a test and not a quiz was displayed!
Now the system will come with bogus names for students and classes. They are examples.
Each entry can be changed to meet your requirements. The procedure is simple. First of
all you need to change the menu line entry. If it is in the primary menu then you will
change the class identification. If it is a secondary menu then you will change or make
an entry as to a student in a specific class. Rather than entering a student code (a,b,,g)
you will enter an (X). The current single class menu is as follows:
PARENTS INFORMATION SYSTEM
The Parent Information system consists of:
To access the Parent's Information System you must enter the password that you set
up in the IET system controls. This is important since you do not want any
of the students to access these applications. When you enter the password, the
system will load your sign on entry to the C~GATES system, and load your profile.
When you exit it will save your profile in the event that you may change anything.
The system checks the MASTER FILE for the IET system to verify that you are an
administrator before proceeding.
PARENT CONFERENCE LOG
The parent conference log is simply a method of logging your parent conferences. You can
either print them or have direct access to them on the computer. You can tab to each
field on the document for entry. Press ESC after you have made your entry.
MULTI CLASS STUDENT'S INFORMATION
In the multi class situation, the first menu will include the names of each class
that the teacher is teaching. Each of these entries will refer to another menu.
In those menu's you will enter student names and each name will refer to a text
file that support entry of information regarding the student. The structure of the
text file is paragraphic and the initial entries in this file are:
If you have more than 2 conferences with parents for a given student you can simply add
another entry as I) CONFERENCE 3 NOTES and so forth.
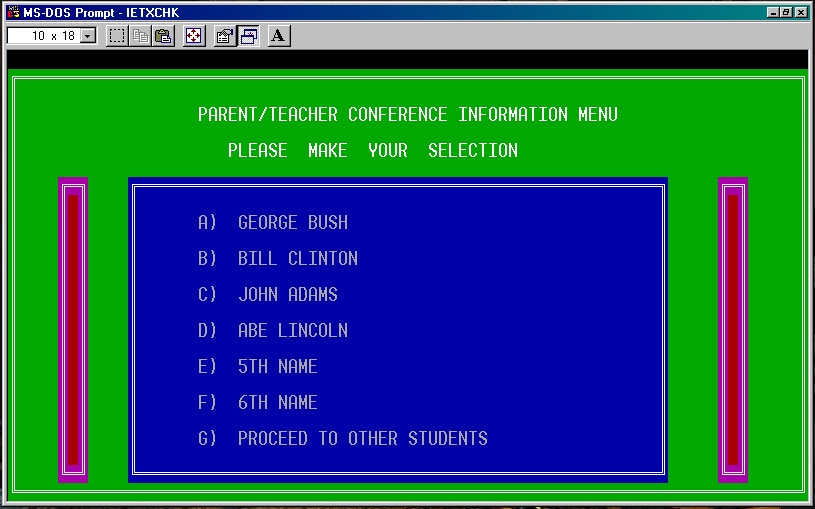
By entering (X) you will get the following menu:
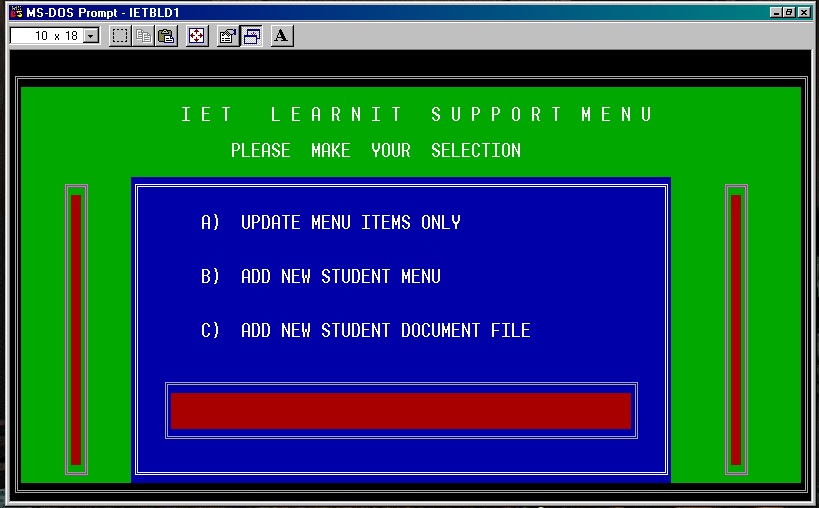
If you choose A) UPDATE MENU ITEMS ONLY the following screen will appear.
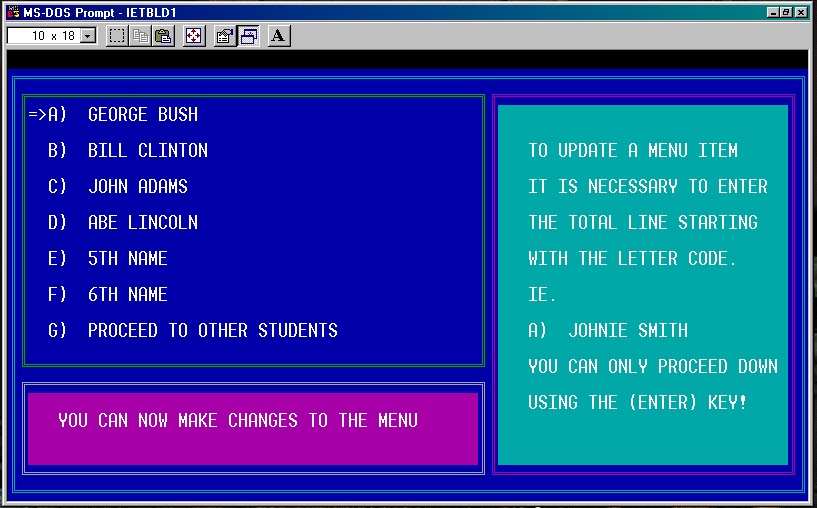
An arrow appears at the point of entry. If you are going to change the name do so but be sure to reenter the line code such as A) Jim Smith. When done with that student press enter and the arrow goes to the next entry. If you have more students be sure to leave the last entry (G) as Proceed to other students. Once complete the updates will be applied. You will see the question ANY MORE REQUESTS. Respond (Y) for yes to this option. Although some of the sample names had document files already you still need to proceed to this next step for any name that you changed or added. Select this time option (C)ADD NEW STUDENT DOCUMENT FILE. The same menu will appear as in the case of updating the menu screen but this time it will ask you which line item by letter selection you which to build a document file for. You will enter a letter code. If it was for Abe Lincoln you would have entered (D) of course at this point you would have changed Abe Lincoln to a name of one of your students. Once you have done this the file will be created.
Now the last entry must be reserved for a continuation of student entry. You can place on this line item 'PROCEED TO OTHER STUDENTS'. For this item you need to create a new menu. Therefore select option (B) ADD NEW STUDENT MENU. The process is the same, you will enter in this case the letter (G) and the program will create a new file and have line item (G) point to that menu module.
One note about paragraphic mode of entry and inquiry. When you select a student it
automatically goes to the paragraphic word processor with the unique files set up
for that individual. You will first get a message in the right window. Pressing ENTER
will display the paragraphic list of entries. You can access any of the entries by simply
entering the letter code. Once you do so, you can either read what was entered previously
in the left window or enter more information. When done press the ESC key. This will save
what you have entered. The program will then ask you if you wish to end access.
If you enter (y) it will exit with edit options otherwise it will prompt for a new entry.
Note that the changing the header option will not work in this mode. You can change,
delete, modify entries in the paragraphic list or simply print the total document file
in paragraphic mode.
One other item, you must at least access one of the entries before you can exit the
system.
Once a level is completed for a given subject, the three parts listed should be reduced to
a single level completion entry. Example:
When the parent and student reviews the educational profile he or she sees it as a
professional internet document. That is to say the document is actually an HTML program
designed for internet usage. To simplify the teachers involvement the system does all the
hard work while the teacher/tutor simply works will a word processing list.
When you select PARENT'S SUPPORT SYSTEM you will get the following display:
SINGLE CLASS STUDENT'S INFORMATION
The single class student information system is similar to multiple class except that the
first menu start with students names. Refer to the multiple class student's information
procedures.
STUDENT'S EDUCATIONAL PROFILE
The student's educational profile is the selection of a MAJOR, MINOR, and CURSORY SUBJECTS.
Setting up the profile requires the participation of the parent, student, and teacher/tutor.
Now the career profile is based on the CAREER PLANS. We propose that the educational profile
be set up as early as the first grade but the extent of entry is limited to what will be
studied at that grade level and possibly the next for advanced students. In other words
the educational profile subjects will grow as the student advances is grade levels. So the educational profile list for a student will include those subjects being studied and the
specific levels and parts completed.
Would upon completion of part 3 reduced to:
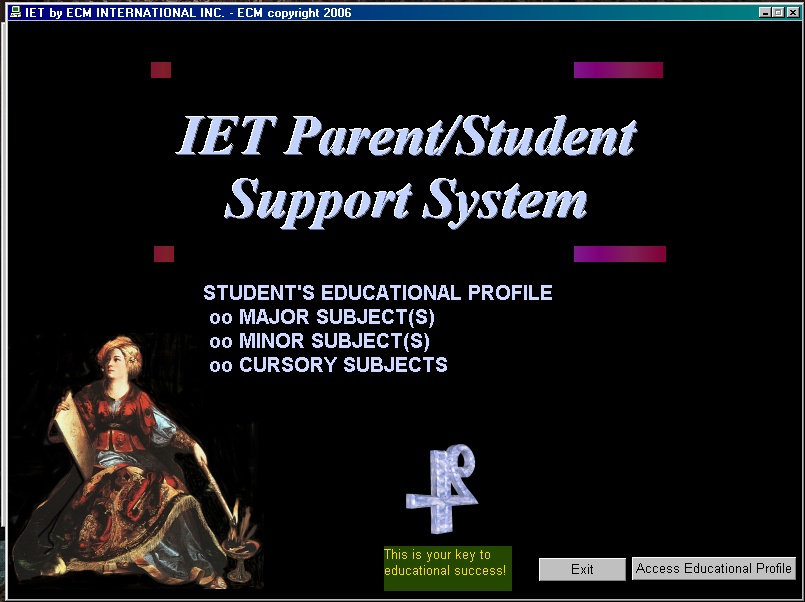
Click on ACCESS EDUCATIONAL PROFILE and you will get the next display:
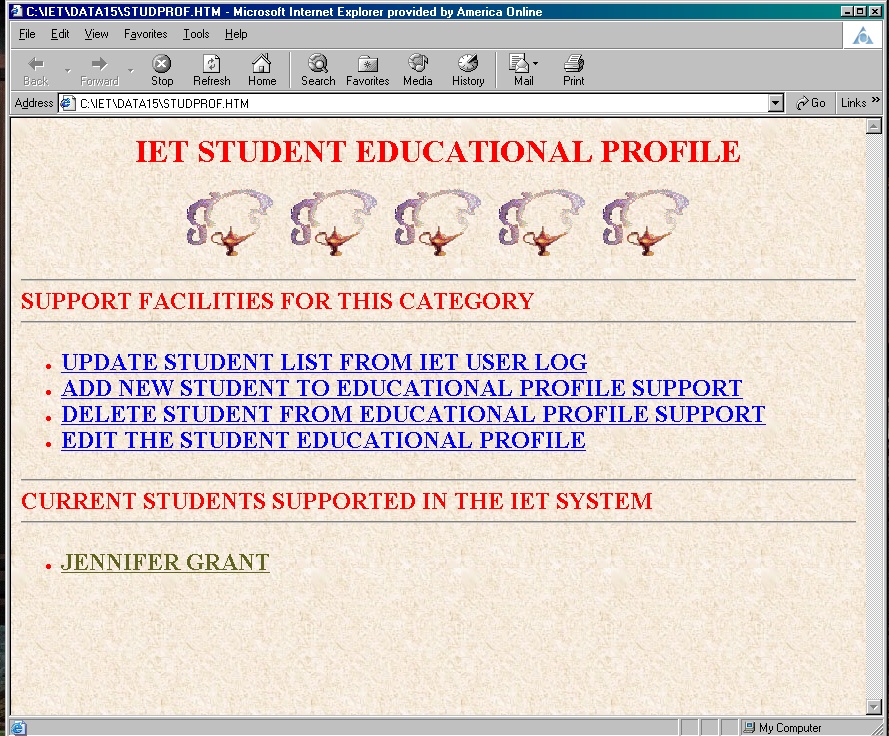
As the display shows there is already one student in the system. We will be using this student as an example throughout. She was the first student to utilize this system starting in Junior High. If you now select JENNY GRANT you will access her educational profile as shown below:
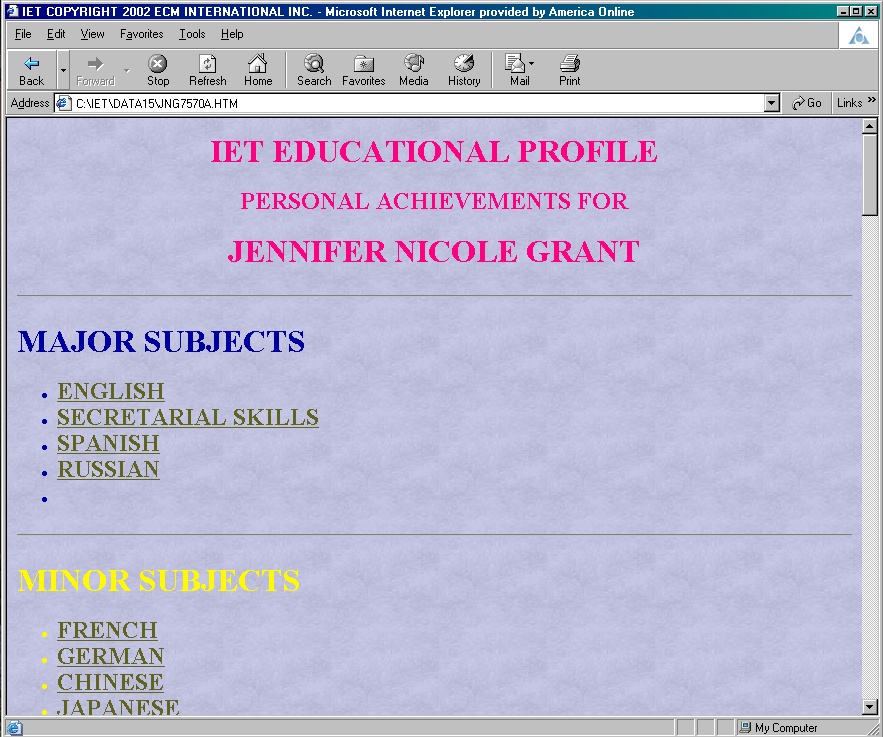
and if you then select SECRETARIAL SKILLS the following display will appear:
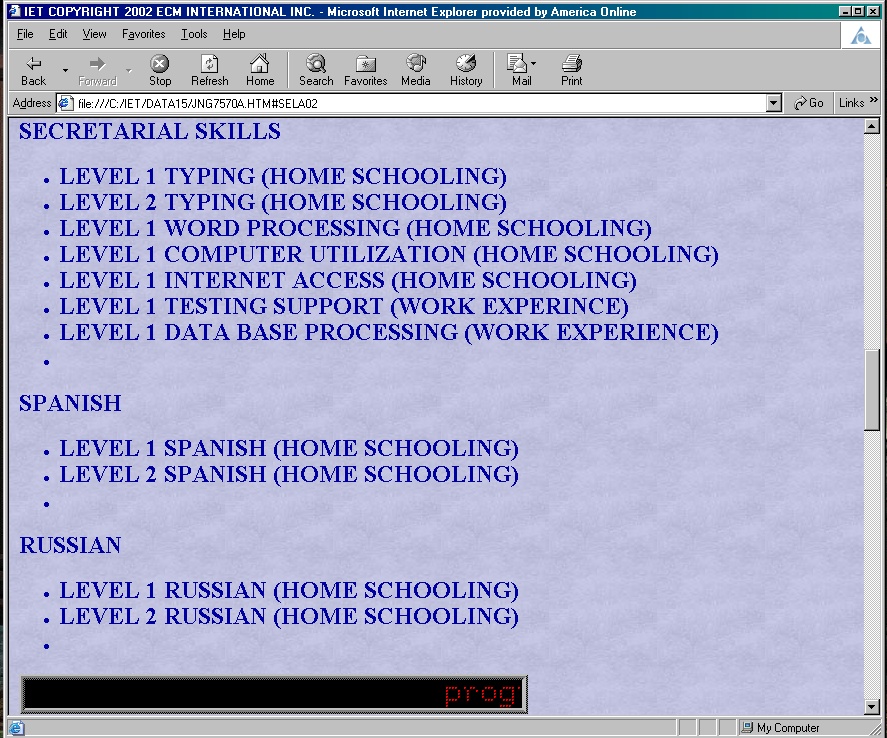
So the displays have all the features of an internet application. Now entry of information into this system only requires processing and changes a text file. Lets look at the text file that is used to support the above displays:
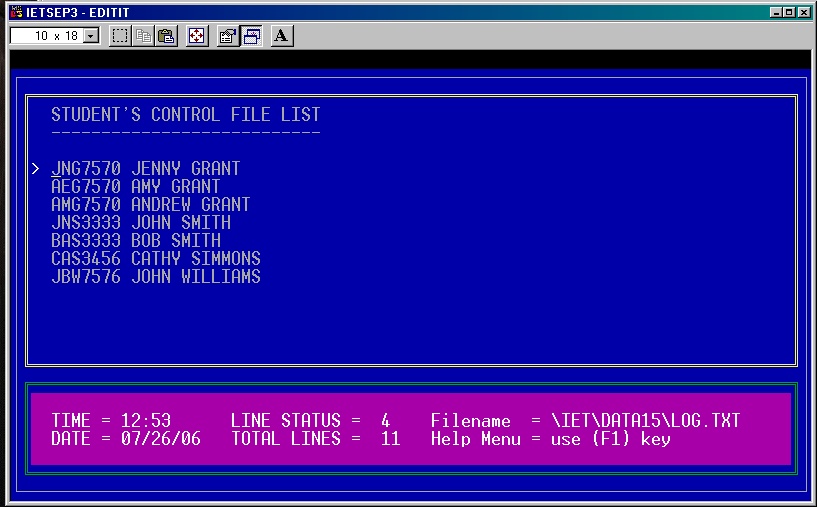
First of all you will select EDIT STUDENT'S EDUCATIONAL PROFILE. This will display a list of students as entered in the IET user list. You will position in this case to JENNY GRANT by pressing the ENTER key until the cursor is next to the line that has JNG7570 JENNY GRANT. Then you will press the (=) key. This is the same as in the processing of ESSENTIAL ELEMENTS. By doing this the program extracts from the HTML program file a text image of the data being displayed so that you can modify it in text mode.
The following displays show some of the data extracted for JENNY GRANT'S EDUCATIONAL PROFILE PROGRAM.
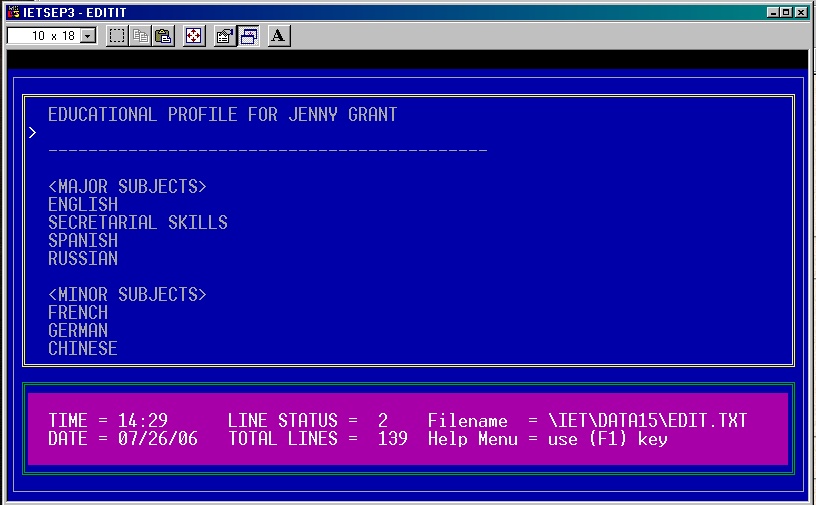
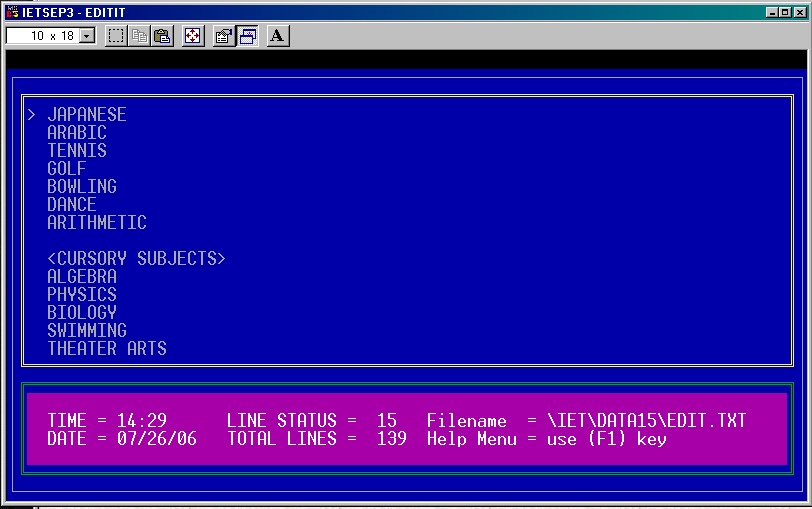
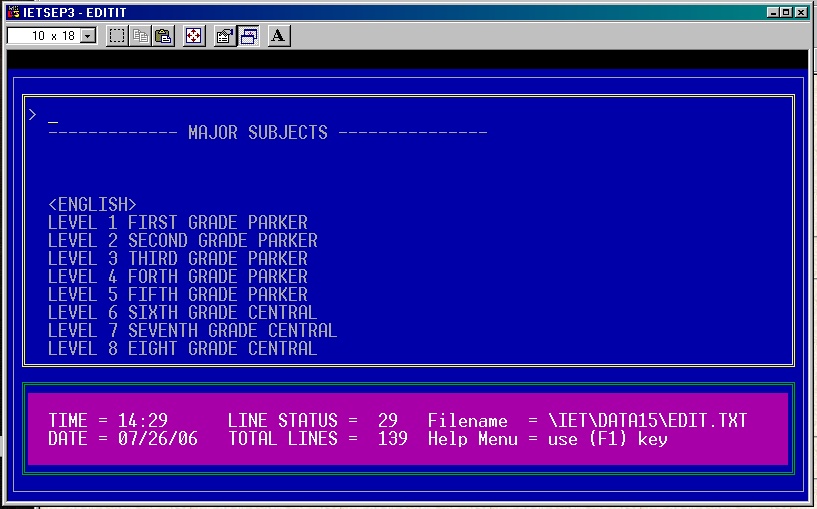
Now you can edit this text data as you would a regular word processing document. There are a few rules that must be followed:
- DON'T MODIFY (MAJOR SUBJECTS) LINE
- DON'T MODIFY (MINOR SUBJECTS) LINE
- DON'T MODIFY (CURSORY SUBJECT) LINE
- DON'T MODIFY ANY DASH LINE
- KEEP SUBJECTS IN IDENTICAL SEQUENCING
- LEAVE SPACE LINES BETWEEN DASH LINE AND DATA
Relative positioning means if the new subject is the third subject under the category of minor subjects then it must also be the 3rd subject in the minor area which has the achievements listed.
If you add a new student to the IET user list, then you need to select UPDATE STUDENT LIST FROM IET USER LOG. This will add the student name and his or her controls to the student control file. Next you will want to add the student to the EDUCATIONAL PROFILE support menu. To do this simply select ADD NEW STUDENT TO EDUCATIONAL PROFILE SUPPORT. Again this will display all the students in the system from the user log. Simply position to the new student and press the (=) key. NOTE that the student will not appear in the EDUCATIONAL PROFILE MENU until the next time you access it.
At the end of the school year or whenever a student leaves your class, you need to DELETE the entry 1st from the IET USER LIST. This was described in the IET control facility. Furthermore you need to delete that student from you EDUCATIONAL PROFILE menu. To do this simply select DELETE STUDENT FOR EDUCATIONAL PROFILE SUPPORT. Again a list of students will be displayed. Position to the student to be deleted and press the (=) key. The student will be deleted from the EDUCATIONAL PROFILE menu. Again you need to restart the program before you will see the change.
Furthermore, if you are deleting a student who is going on to another grade or tutor that
utilizes the IET system you need to utilize the DOCUMENT TRANSFER FACILITY from the primary
PARENT/STUDENT SUPPORT FACILITY. This will transfer the student's information to a ram drive
which can be taken with the student to the new class or tutor.
NOTE: DO NOT ISSUE THE DELETE FUNCTION BEFORE YOU RUN THE TRANSFER FACILITY.
The delete function removes the student from the menu and deletes any support files.
When you select this function by clicking on STUDENT'S ANNUAL GOALS, the following menu will be displayed:
STUDENT'S ANNUAL GOALS
The student annual goals support facility provides entry of three types of goals:
It is important to establish goals on an yearly basis. This way the student understands
what he or she intends to achieve for a given year. Now the school year crosses over from
one year to another thus a students goals are included in the information that can be
transferred from one teacher to another via a floppy disk.
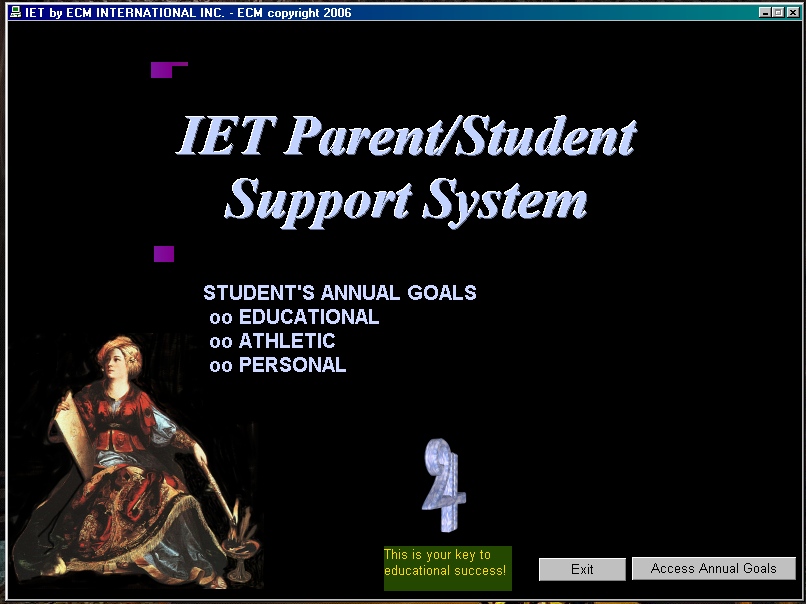
You will then select ACCESS ANNUAL GOALS and the next screen will show the active students and a list of support features as shown below:
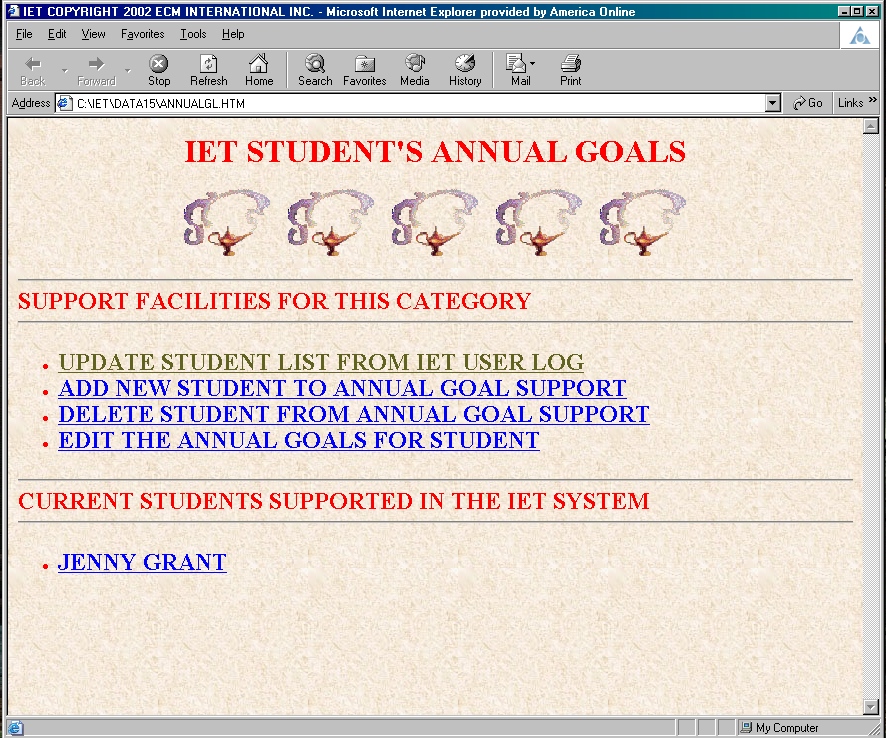
The procedures are similar to the ones used in EDUCATIONAL PROFILE as described above. When using the support features, you first select the student from the students list by positioning and pressing the )=) key. The annual goals are extracted from the HTML program and placed into a text file. You then edit the text using the word processor. When finished you press the ESC key and the changes are applied to the HTML annual plan program. You can then click on the student name in the menu and view the changes.
Adding and deleting students is similar to the EDUCATIONAL PROFILE facility.
NOTE: DO NOT ISSUE THE DELETE FUNCTION BEFORE YOU RUN THE TRANSFER FACILITY.
There is one difference between YEARLY GOALS and EDUCATIONAL PROFILE method.
For yearly goals you enter elements that are to be done while in educational profile,
you enter elements that have been achieved. Therefore in yearly goals, there needs
to be a way to show that an entry was accomplished. To do this simply place an (*)
after the entry when you are editing the goals. The system will convert the (*) into
a gif check when displayed in HTML mode as shown below.
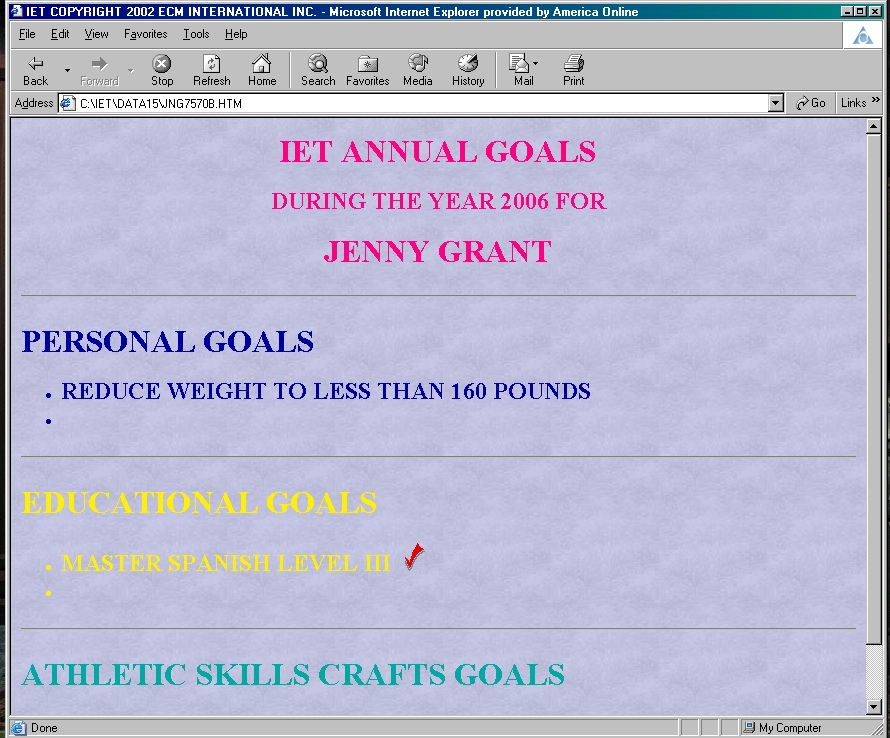
With each career plan there are certain subjects that need to be mastered to a certain
level. For the extended career plan, the levels increase was well as the number of subjects
to be mastered. A secondary career plan may only require different subjects mastered at
specific levels.
The setup of subjects and levels is not the responsibility of teachers but rather school
administrators who work with the business community to determine the proper set of subjects
and levels. Each career should then be listed in a manual that can be used by teachers
to set up the proper information for both the parent and the student. If none is available
for a given career then the responsibility lies mostly on the parent to develop a proper
career plan.
To access the student's career plan select STUDENT'S CAREER PLANS from the PARENT/STUDENT
SUPPORT FACILITY MENU. When selected the following menu will be displayed:
STUDENT'S CAREER PLANS
The career plans are divided into three categories:
The primary career plan is your first option while your secondary career plan is your
second option. The extended career plan is based on achieving either the primary or
secondary career plan.
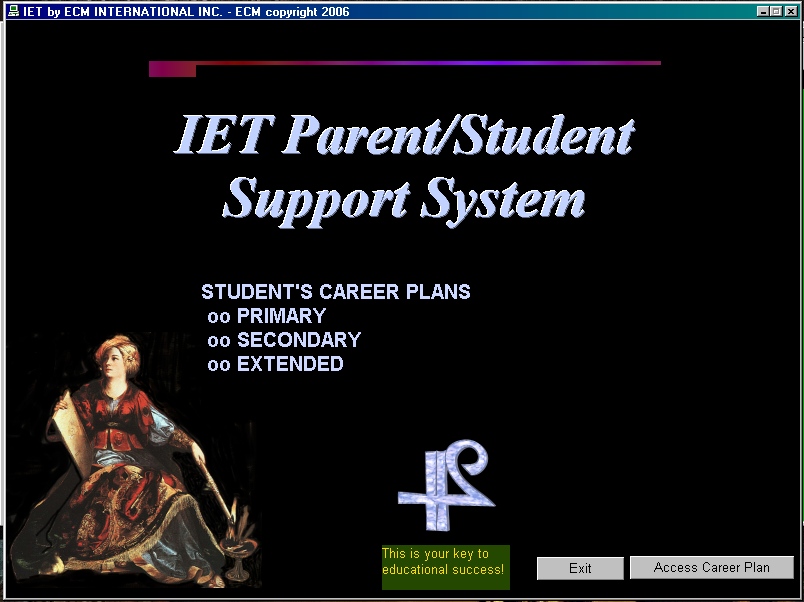
Next select ACCESS CAREER PLAN which will display the following screen:
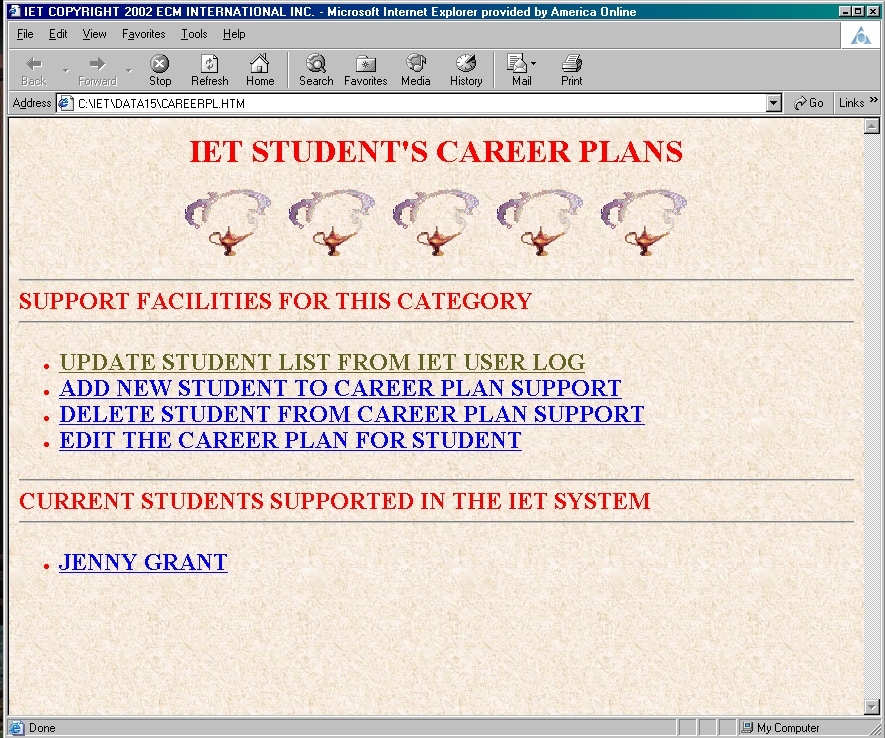
This facility is quite similar to both the EDUCATIONAL PROFILE and YEARLY GOALS.
The processes are all the same. You can update the student list by selection of
UPDATE STUDENT LIST FROM IET USER LOG. You can add a student and a sample career
plan by selecting ADD NEW STUDENT TO CAREER PLAN SUPPORT. You can delete a student
from the menu by selecting DELETE STUDENT FROM CAREER PLAN SUPPORT.
NOTE: DO NOT ISSUE THE DELETE FUNCTION BEFORE YOU RUN THE TRANSFER FACILITY.
You can edit a career plan by selecting EDIT THE CAREER PLAN FOR STUDENT.
In each of the above procedures you will first get a display of students. Select the
proper student that you are processing by positioning to the line with the student name
and press the (=) key. If you are editing the text there is a sight variation here.
In the career plan units, there are subjects and the level to be achieved. Place an (*)
after a plan unit to designate that a level was achieved. So if three levels have already
been achieved for a given subject which requires seven levels, you would place three (***) after the level specified.
Finally to display for a parent or student their career goals simply select the name.
You will have one sample entry. In this case JENNY GRANT is displayed. When clicking
on JENNY GRANT you will get the following display:
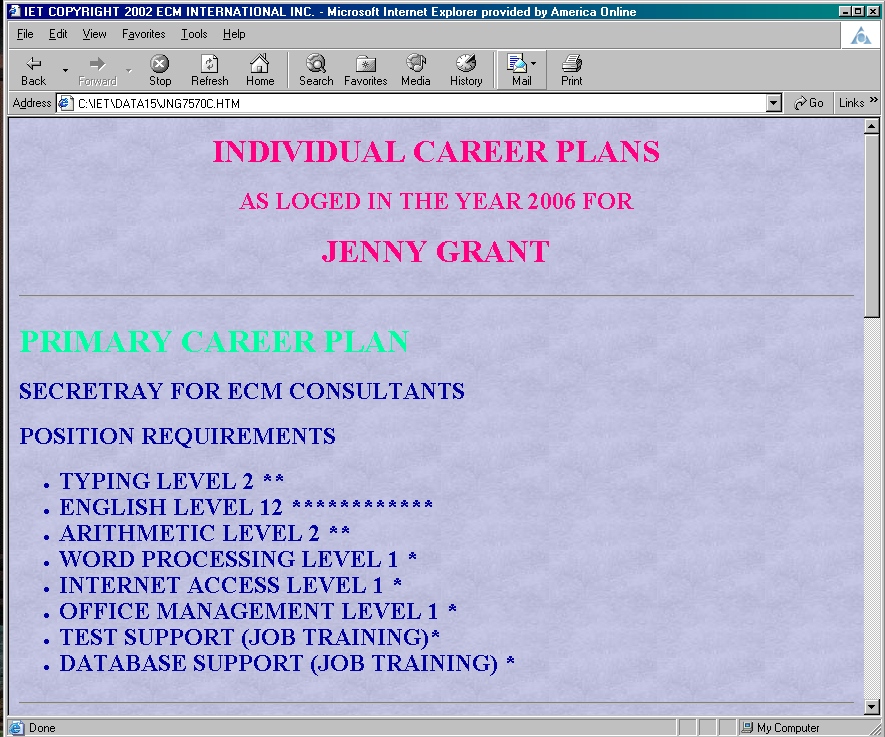
Note that the year is listed. If a student changes his mind and changes his or her career plan, it first should be printed as is and saved in the student's manual. As a matter of practice at the end of a semester or school year, the students data sheets should be printed and placed in the students manual if there were updates.
To access this application, select DOCUMENT TRANSFER FACILITY from the PARENT/STUDENT
SUPPORT FACILITY. A mini menu will appear with the following options:
One note: If you load a student's data files to your system and then add a student's
name to a parent/student support facility like student's educational profile, a message
will appear that a file already exist, shall we proceed? Be sure to answer (Y)es. This
way the student's name will appear in the support menu and the document that you uploaded
will be used for that student instead of a model.
That concludes the full description of all the features of the IETCOM system. While all the
features have been developed, the system is not totally complete until all subjects in all
areas of study have been fully developed under the constraints of the system. This is
a challenging task requiring support from individuals and companies that may be interested
in supporting this method of teaching. The base system has been developed
by a single individual, Serge Grant, in support of the IET educational managament system.
DOCUMENT TRANSFER FACILITY+
The document transfer facility provides the portability of student's IET documents
to be transferred from one teacher/tutor to another. At the end of a school year or
if the student is changing schools, the critical IET student documents should be
transferred to a ram drive. This ram drive can then be loaded by another teacher/tutor
using this same facility.